In Bidrento Hotel, you have the possibility to add experiences, which the client can book and rent in addition to the accommodation. The experiences can be, for example, a sauna, hot tub, ATV, pool rent, or canoe trip etc.
To add a new experience, you can start in 2 ways - you can add the resources to your environment, which you can do here, or start adding the experiences under the "List" section, which enables you to add resources later on during the process.
Resource is the product or service which can be rented.
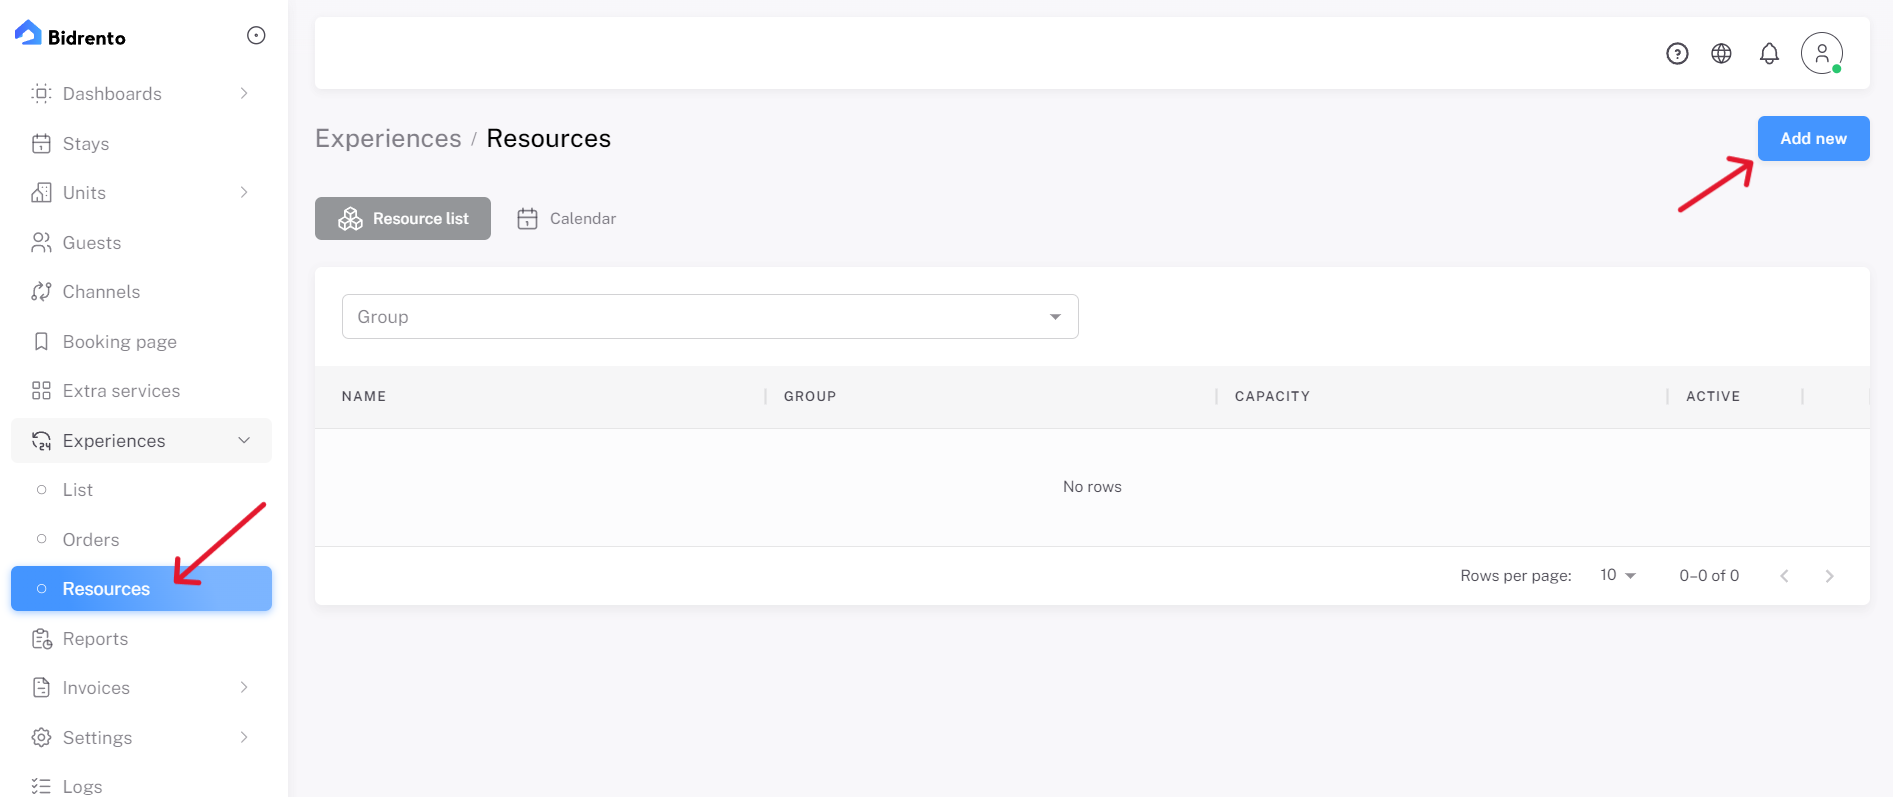
To add a new resource, click on the "Add new" button in the top right corner, which directs you to a new page, where you can enter the basic information about the resources.
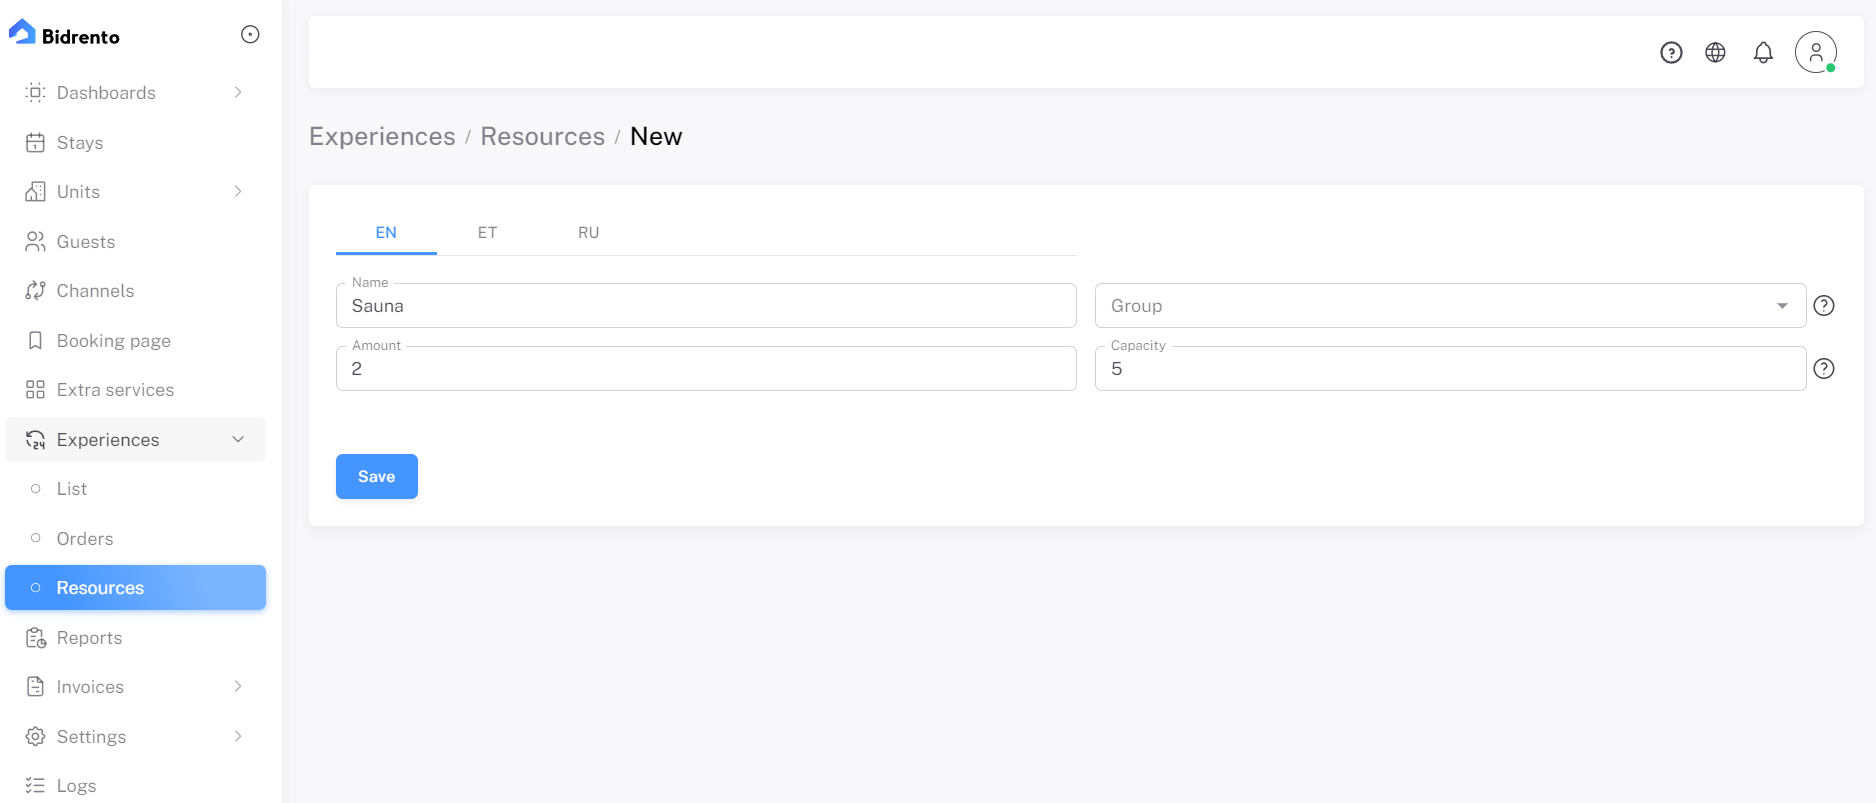
Name - the name of the resourche, for example "Sauna".
Amount - how many resources (in this case saunas), which can be rented out, you have.
Group - if you have same more than one of the resources, they will be grouped together for easier management. The system will create the group based on the name of the resource. Later on, if you have several resources and groups made, you can choose the corresponding group from the drop down, when adding a new resource.
Capacity - this refers to the number how many people can use or fit into the resource. For example, if you have saunas, which fit 5 people each, you can enter the number 5.
After you have filled out the fields, you can click on "Save", and you will be re-directed to the resources page. There you can see the list of the resources. In case you entered that you have 2 saunas, the system will create 2 separate saunas.
If you have added all your resources, it's time to create the experiences, which you can do here, under "List".

You can add a new experience by clicking on the "Add new" in the top right corner, which then directs you to a new page, where you can enter all the necessary information regarding the experience.
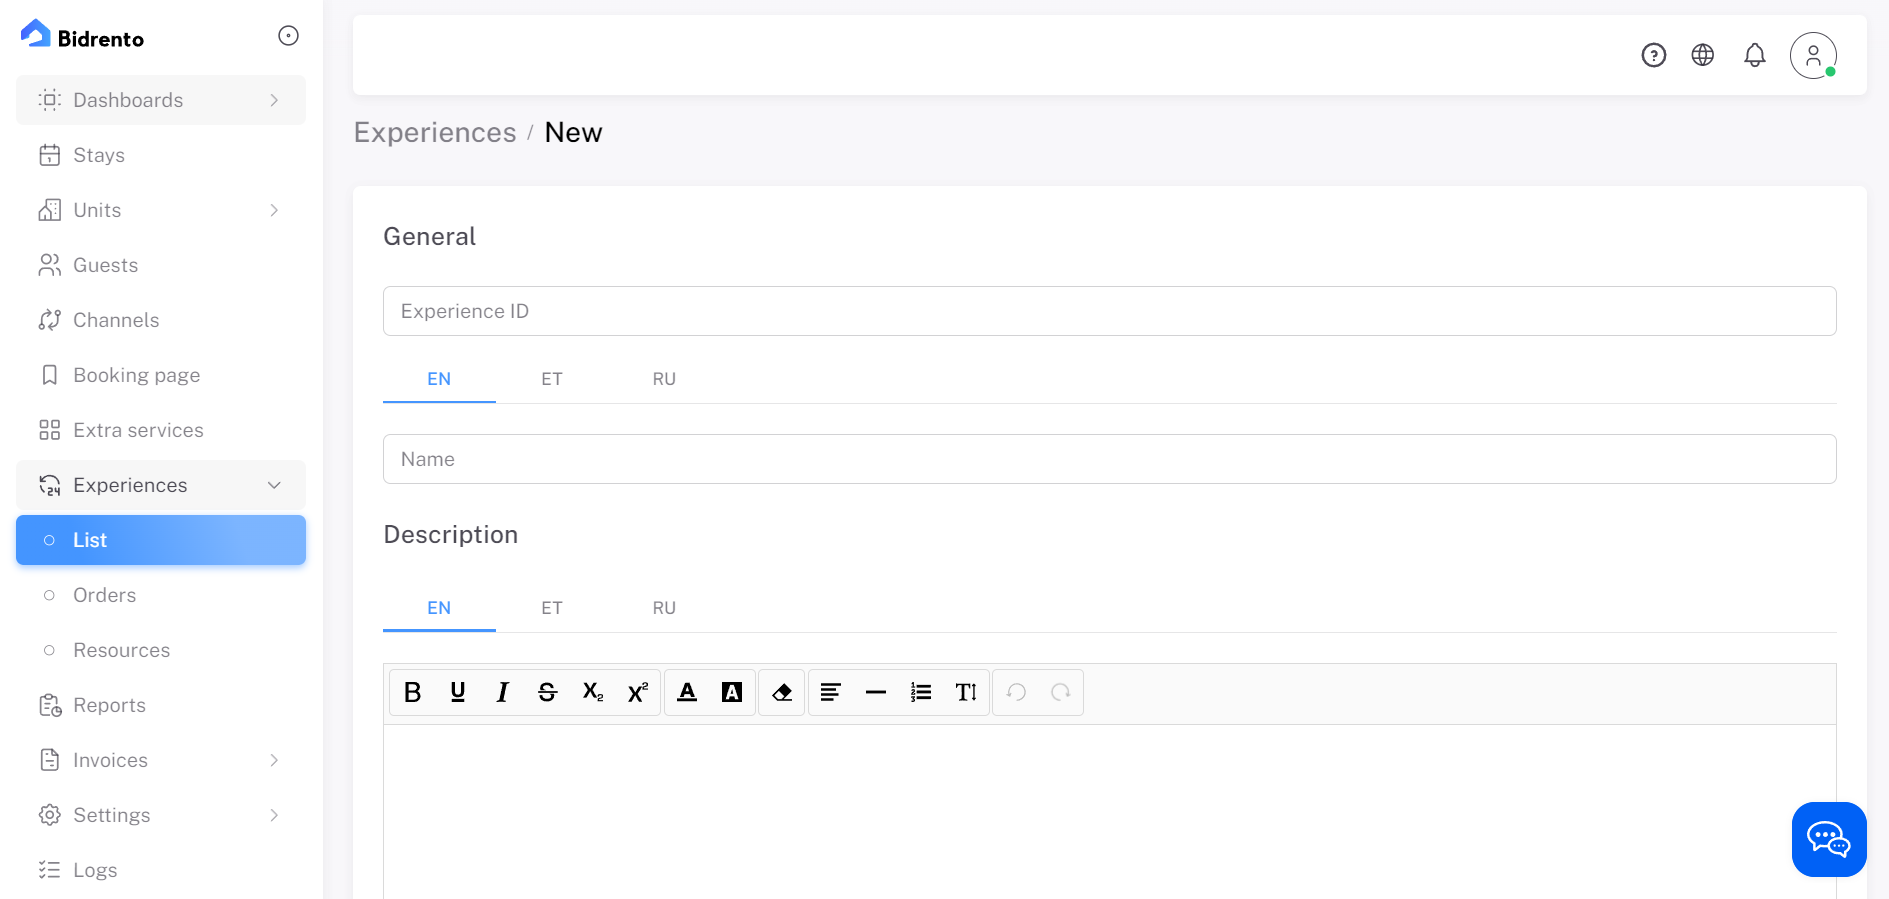
Experience ID - an ID for your internal use in the system. This value won't be showed outside of Bidrento Hotel.
Name - the public name for the experience.
Description - the description regarding the experience. With the help of the text editor, you can modify the text according to your preferences.
Location name - the name of the location where the experience is available. In addition you have the possibility to add a URL from an online map, for example Google Maps.
Images - images about the experience, which you can drag and drop from your computer.
Amenities - here you can add all the features about the experience.
Conditions - here you can add the condition about the experience.
Contacts - here you can add the contact information regarding the experience.
After that you can click on the "Save" button, and you will be directed to the page where you can link the resources you previously added to the system, with the newly created experience, or add new resources.
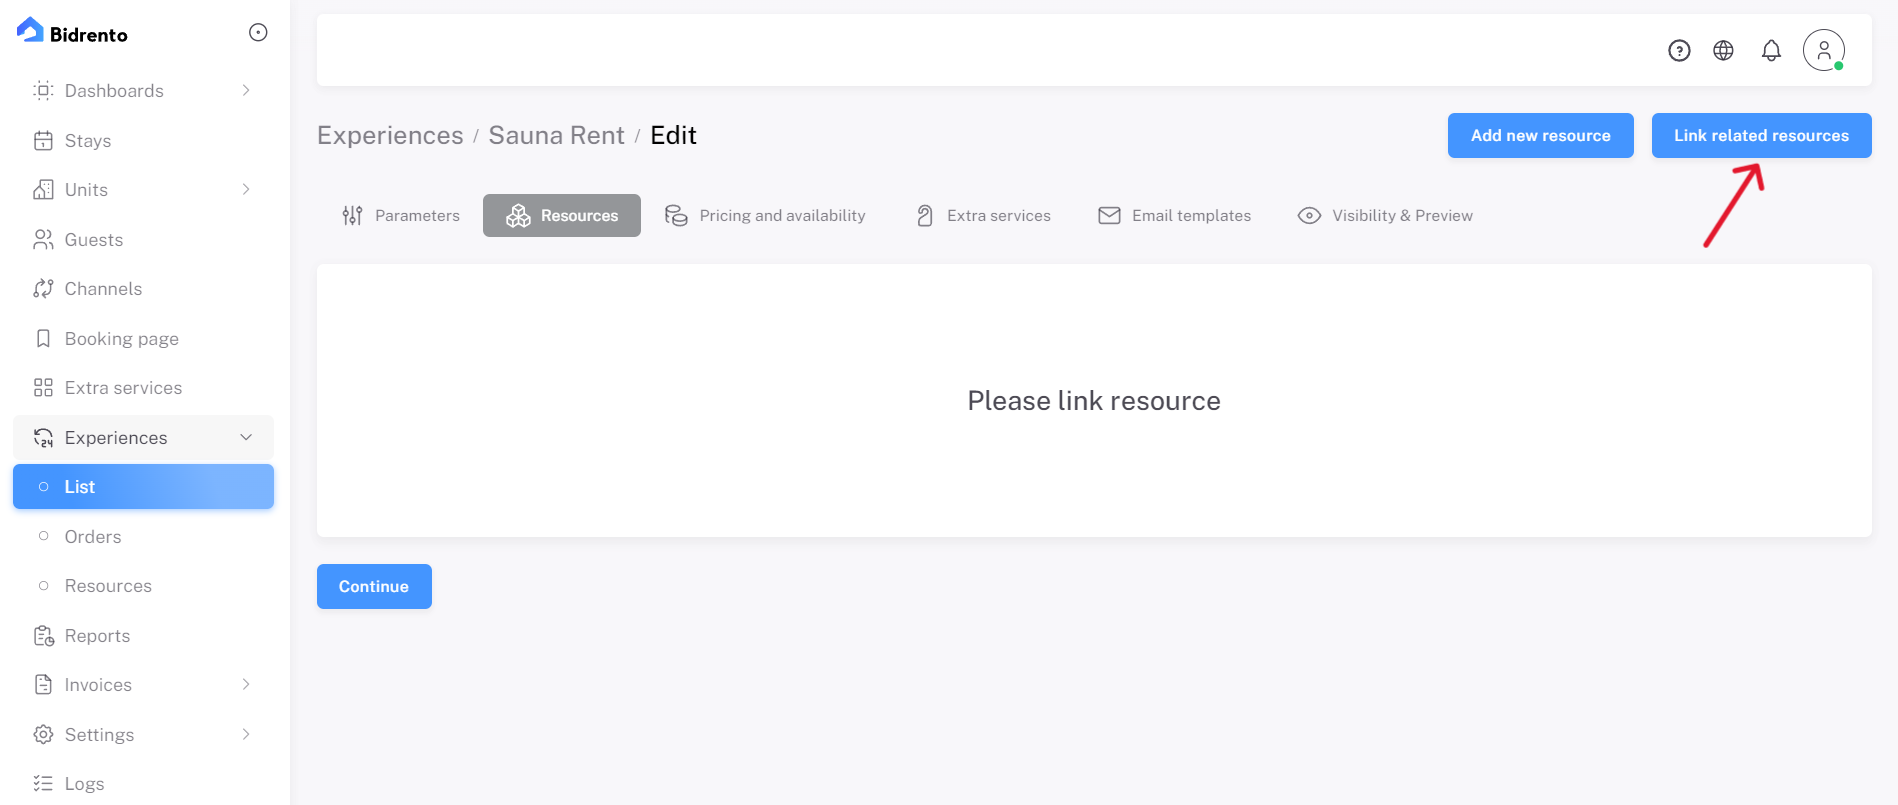
When you click on the "Link related resources", a modal window opens up, with the list of all the resources you have added to Bidrento. You can then filter the resources by their group if needed. Then select the desired resources, and click on the "Link" button at the bottom.
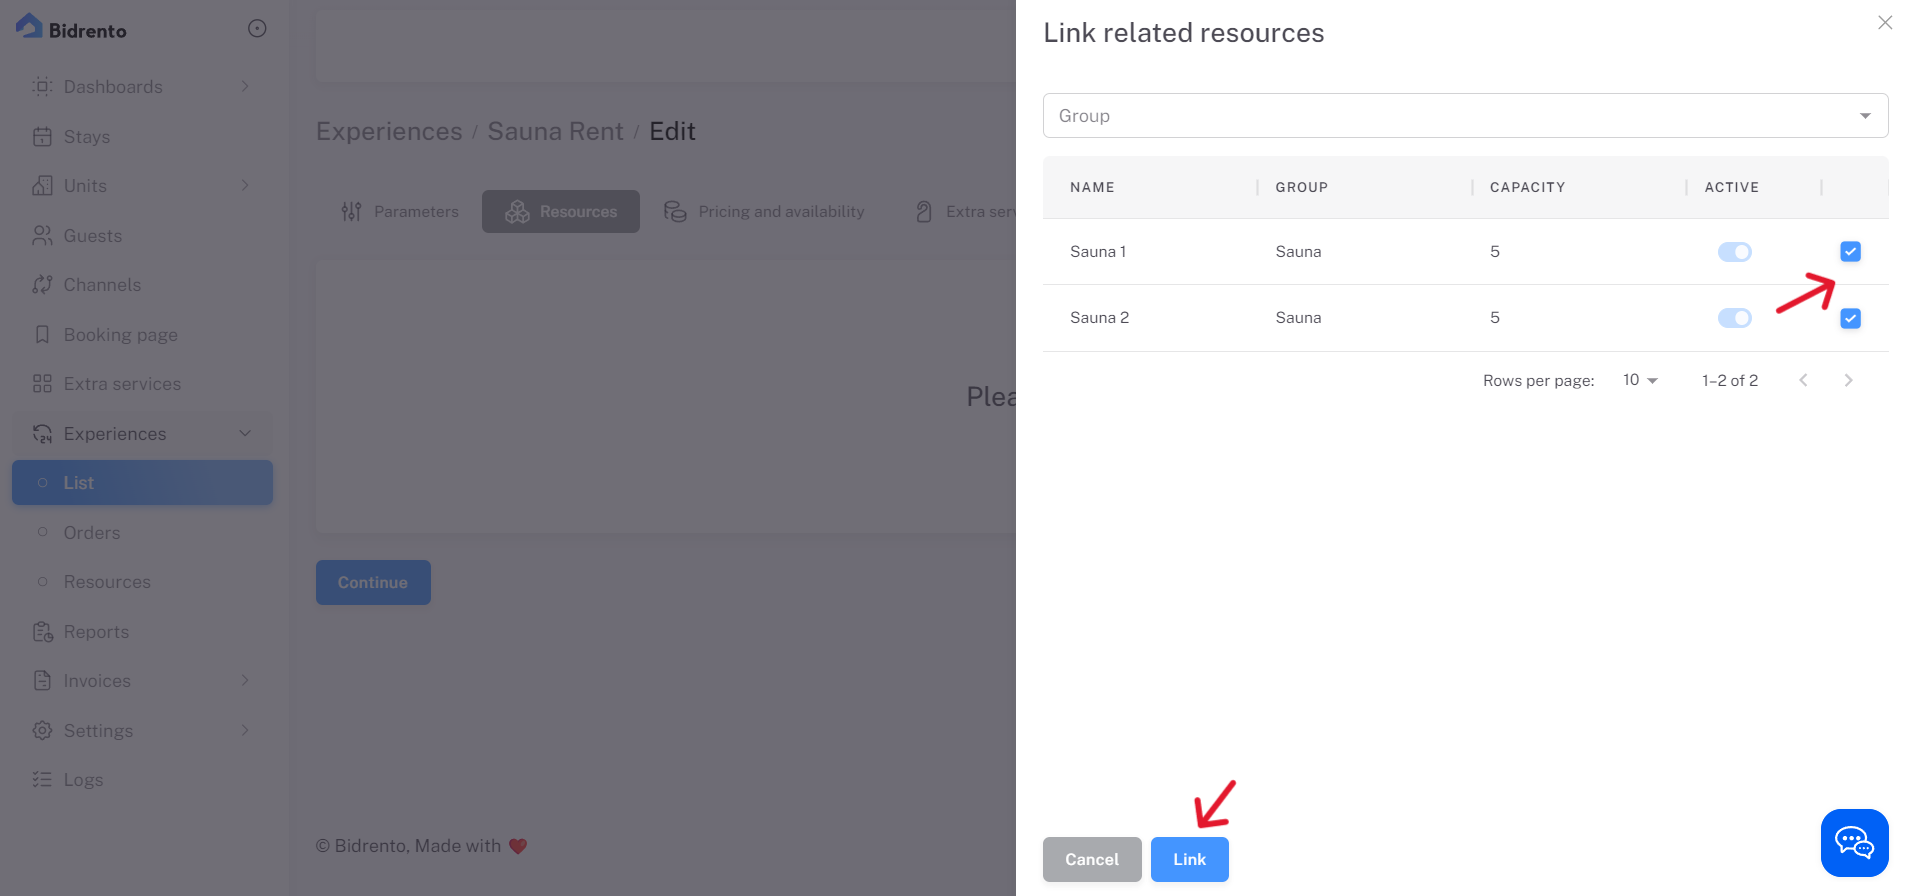
By doing that, the modal window closes, and the linked resources appear in the list. If you wish, you can add more resources to the list by clicking on the "Link related resources" again. In order to unlink a resource from the experience, click on the trash can icon at the end of the resource on the right side.
Once you've linked all the desired resources to the experience, you can click on the "Continue" button. You will then be directed to the next section, where you can set up the pricing and availability.
Price type - you can choose the price type to be either hourly or package based.
For hourly pricing, the price will be determined based on the minimum duration of the time slot. For example, if you want to offer a 1-hour experience priced at 20 EUR, and the minimum duration for each time slot is 1 hour, please set the time slot minimum duration to 1 hour and define the price accordingly for a 1-hour slot.
If you prefer to sell experiences with a minimum duration of 2 hours, then set the time slot minimum duration to 2 hours and define the price for a 2-hour slot, for instance, 40 EUR/Slot
“Time Slot Duration Increment” determines the interval by which slot durations can be increased. For example, if you wish to offer slots with the following durations: 1 hour, 1 hour 30 minutes, and 2 hours, set the slot duration values from "1:00" to "2:00", with a "Time slot duration increment" of 30 minutes.
The package pricing option is suitable when you intend to sell the experience as a fixed-price package with a strictly defined duration, especially for larger groups. For example, an ATV trip for 10 people. The price is defined for the entire package length and amount (e.g. for 10 people). You can setup how many resources will be booked with one package.
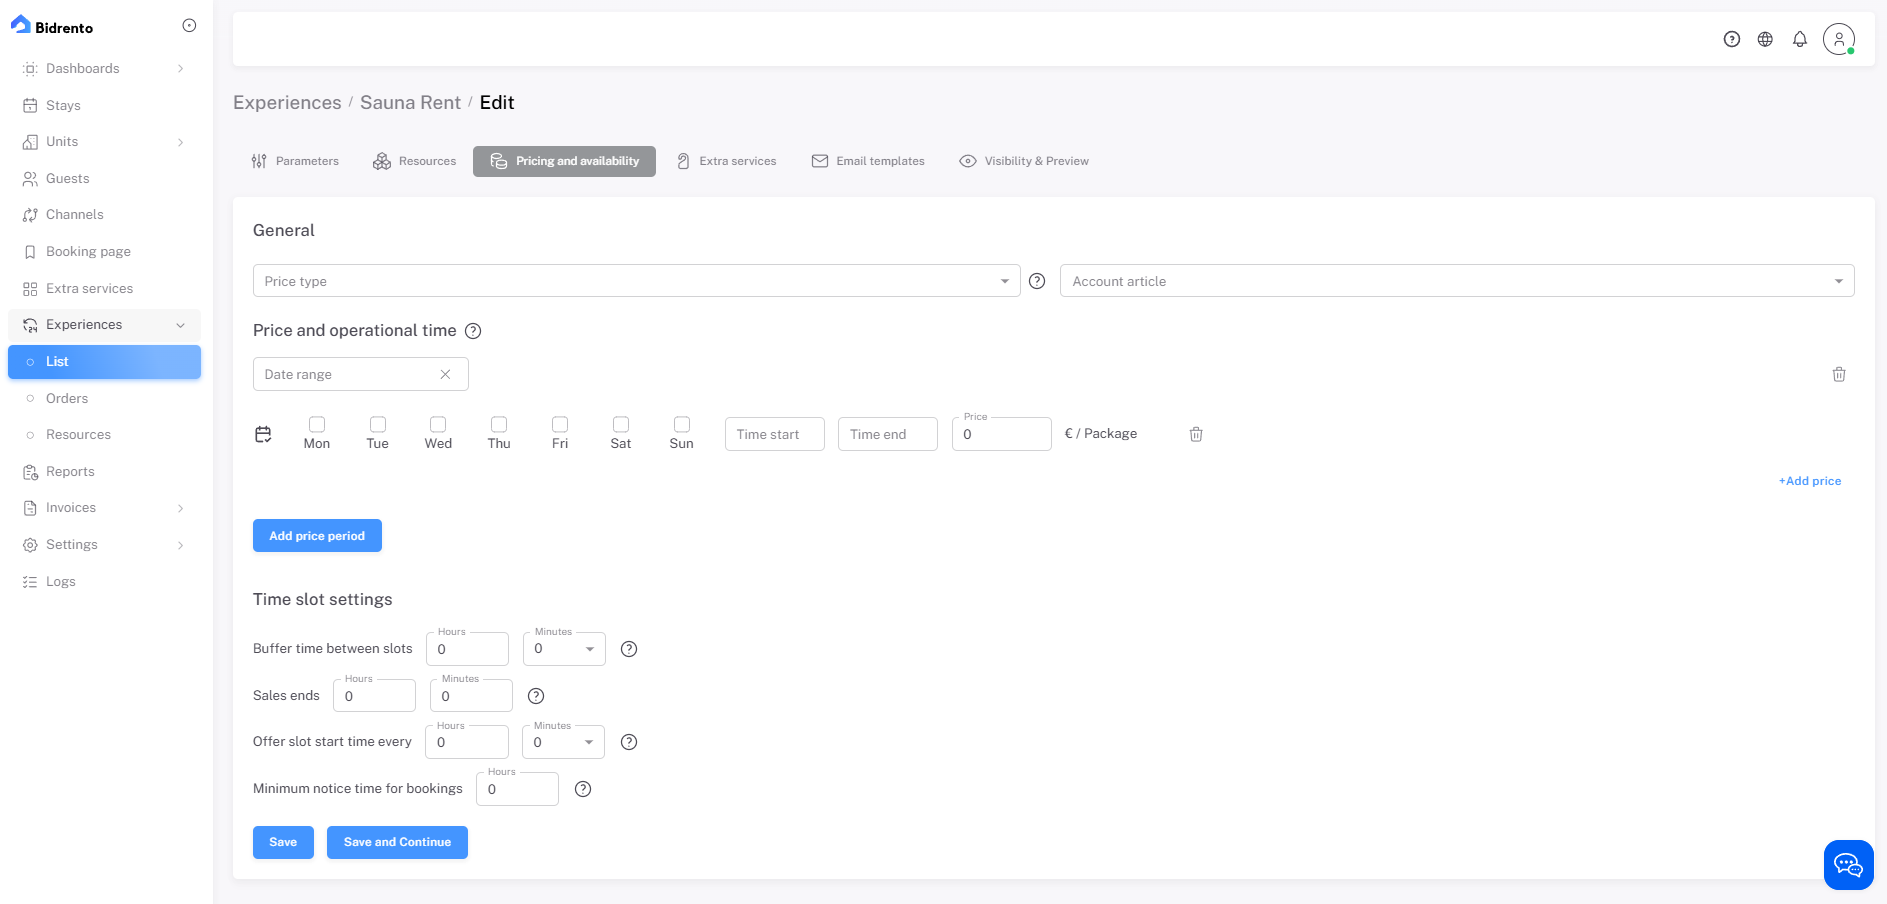
Price and operational time - here you can define operational hours and prices for an experience, either on a day-by-day basis or for the entire week at once. To add operational hours for another date range, please click on the "Add price period" button. Please note that the price should be defined for the minimum time slot duration increment. The system will recalculate the price based on the actual experience duration during the booking process.
Buffer time between slots - here you can define the buffer time length to be added to a booked experience after booking. For example, if you offer sauna rental for 3 hours and need to add 1 hour for sauna cleaning, set the "Buffer time between slots" value to 1 hour.
Sales end - here you can specify the sales end time by stating the number of hours prior to the operational end time. For instance, if your operational hours for offering the sauna are from 8:00 to 22:00, and you want to ensure no entries after 20:00, you should set the "Sales end" value as 2 hours.
Offer slot every - in this field, you can define the occurrence of event start times. For instance, if you wish to offer an experience that starts every full hour and lasts for 2 hours, configure the following values: Guests can select slots with a duration of 2 hours, with time slot increments set to 2 hours, and offer slots starting every 2 hours.
Minimum notice time for bookings - in this field you can define the minimum amount of time before an experience can be booked. For example, if you wish to have a 2 hour buffer time between the moment of the experience booking, and the start of the experience, you can set the time as 2 hours.
After you have filled all the fields with your specific information, you can click on "Save and continue" button at the left bottom corner, and you will be directed to the Extra services page. The extra services feature will be available soon, and then you will be able to link extra services to experiences.
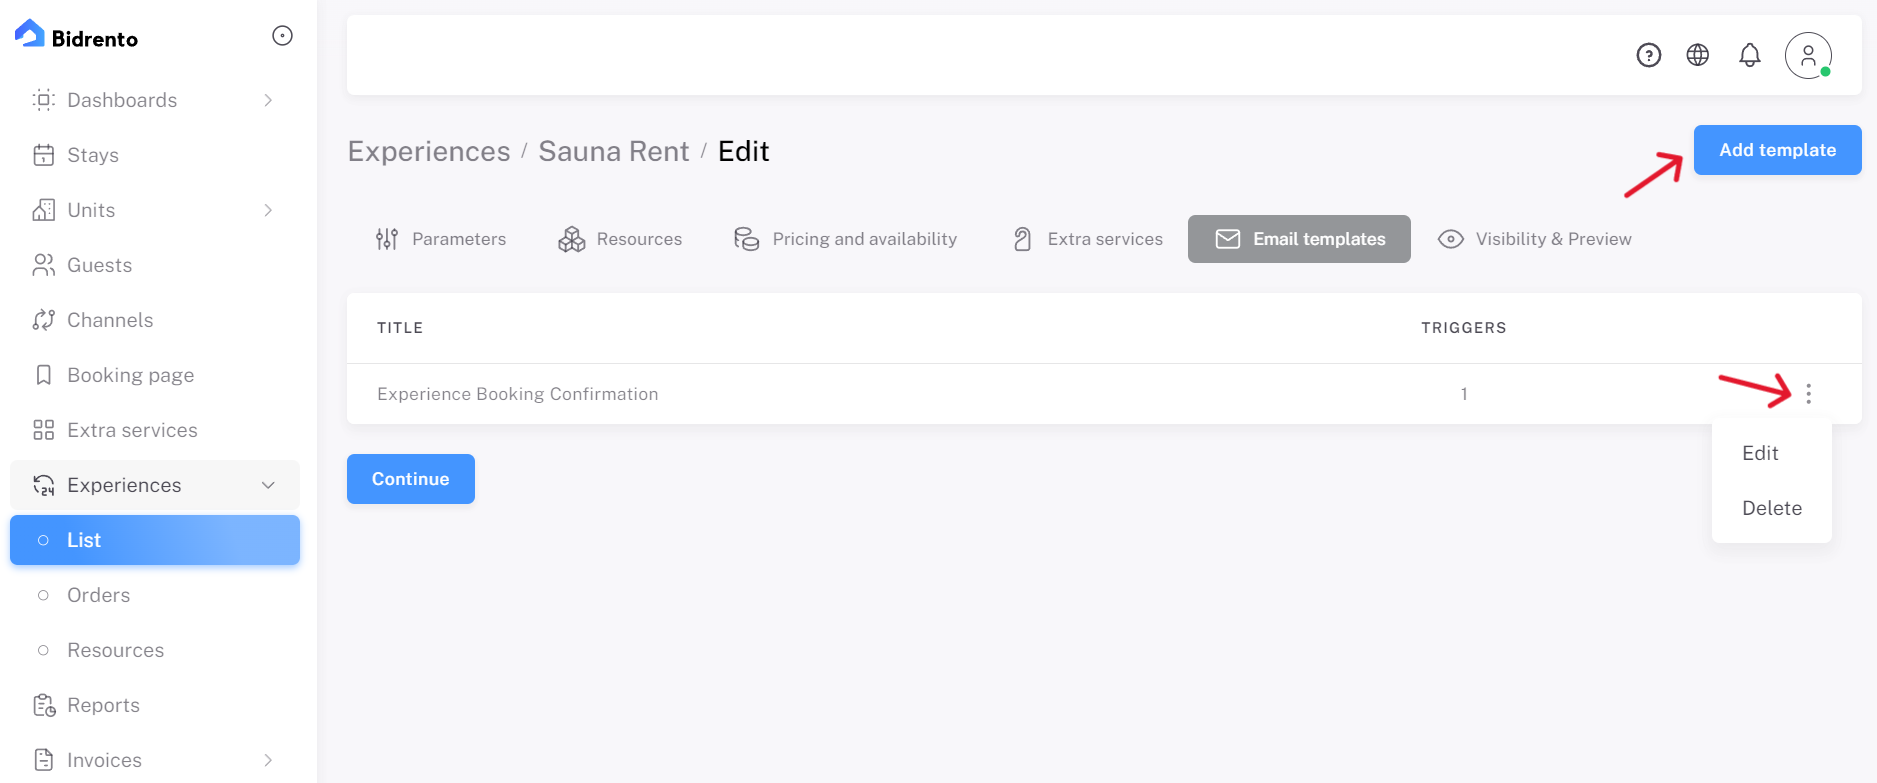
From there you can continue to the e-mail templates page.
On that page, you can see one default e-mail template already in place, but if you wish, you can edit or delete it, and also add your own templates, with custom variables, and the desired triggers.
At the last Visibility and Preview page, you can choose where to display, and actiavte or deactivate the experience.
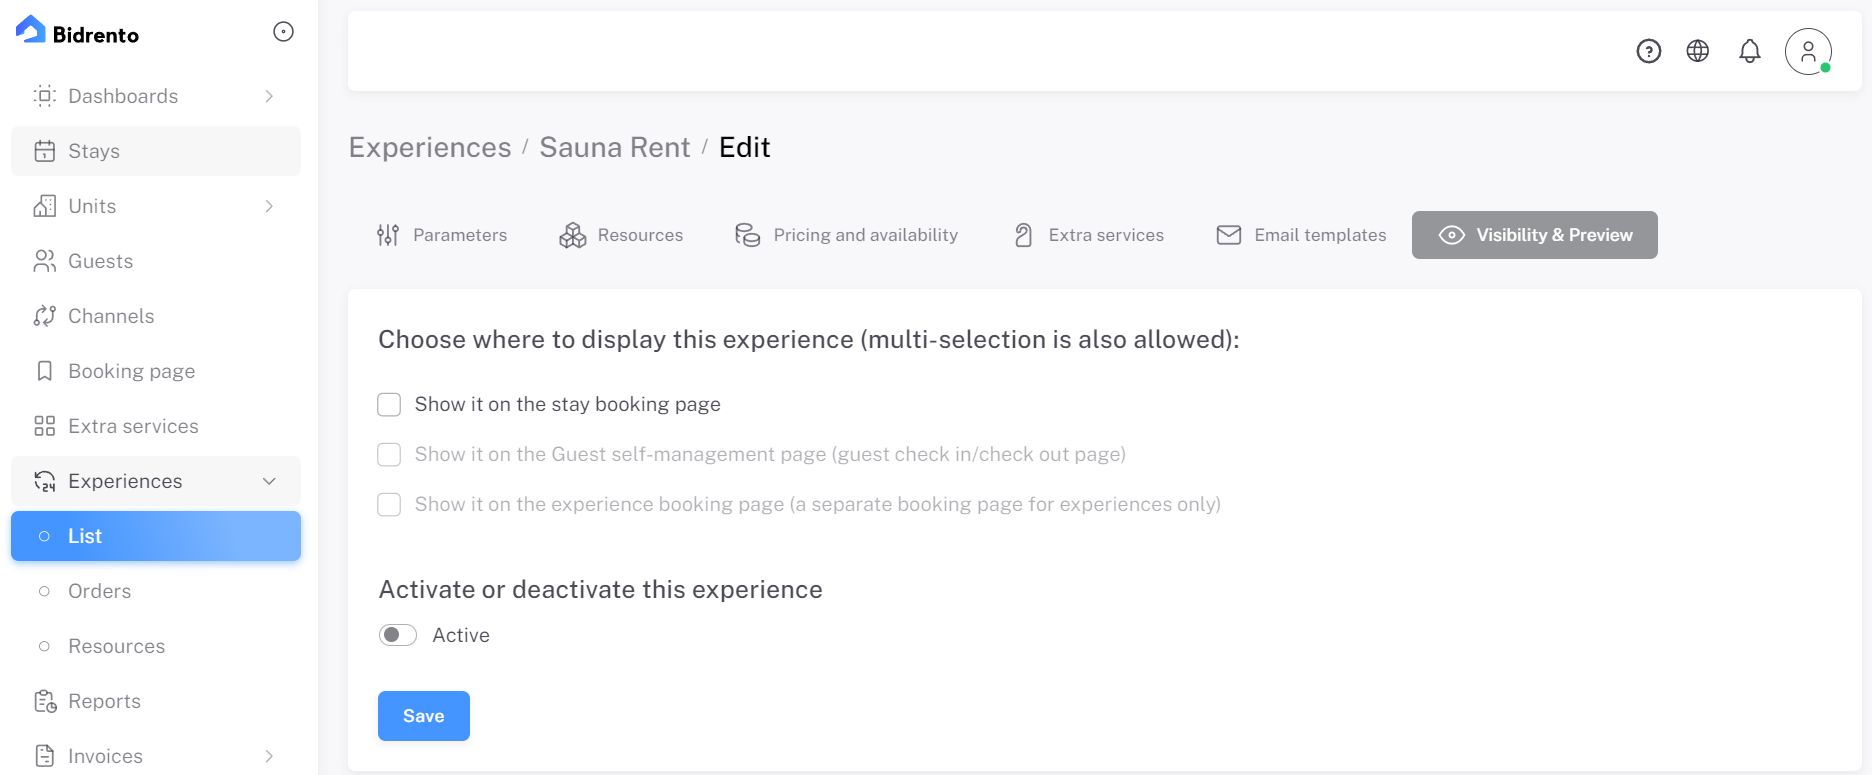
After that you can click on the "Save" button, and congratulations - you have set up your first experience!
You can then continue to the "List" section, and your newly created experience is now visible. From there you can open up the experience, to see the overall view, and you can also edit the experience if you need to do so.
Once you have setup your experiences, you can also generate a separate booking page for the experiences only. You can read about that in more detail here.