Besides the landlord, you can add additional users to the Bidrento platform. Each user can have their own role, permissions, and accesses (privileges) and these can be edited as needed.
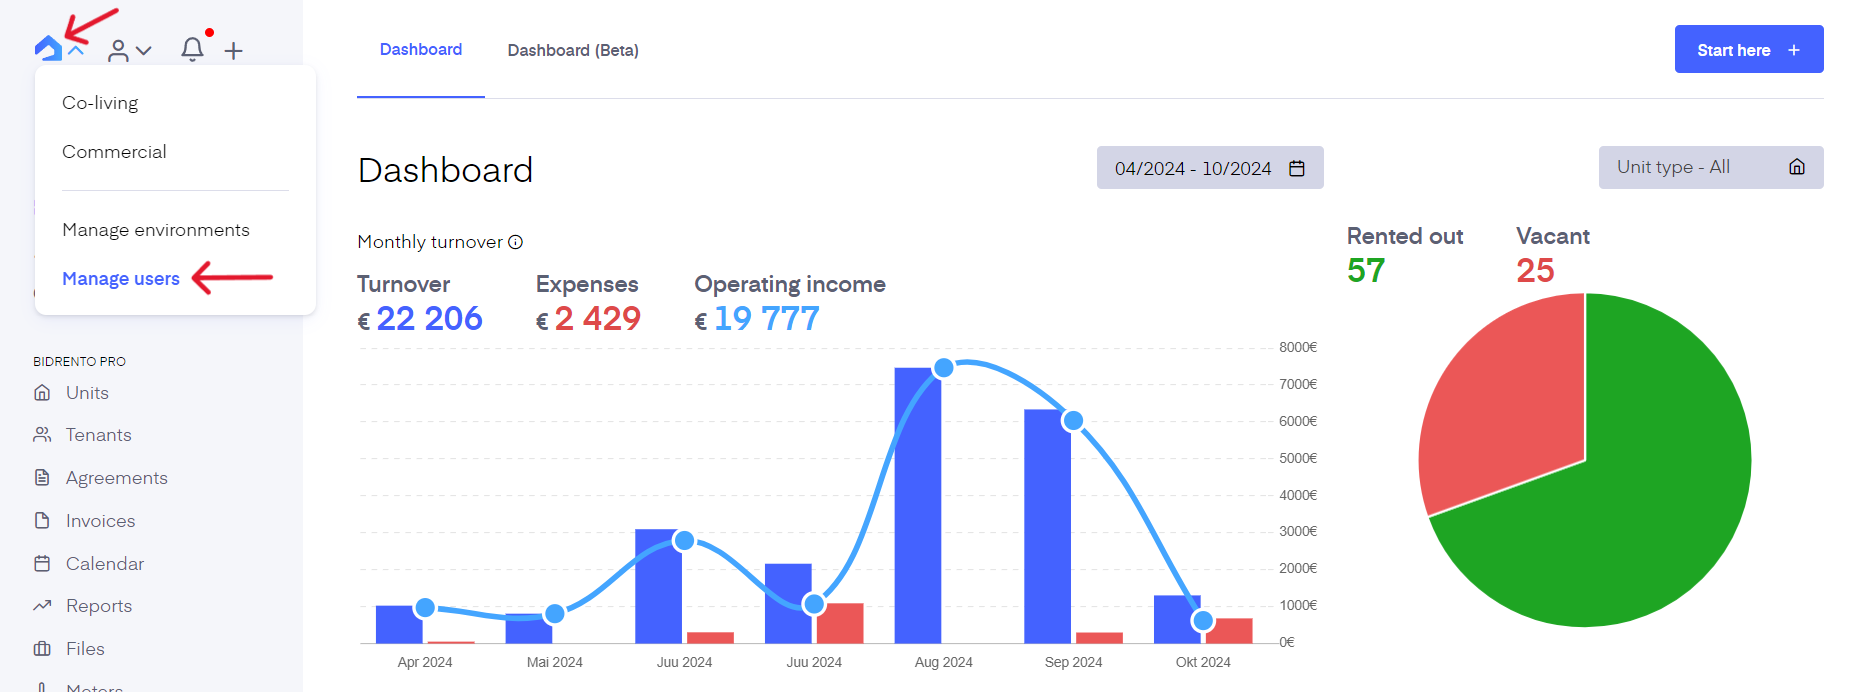
To add a new user find the blue Bidrento logo on the top left corner of your screen, hover over it, and click on ‘Manage users’.
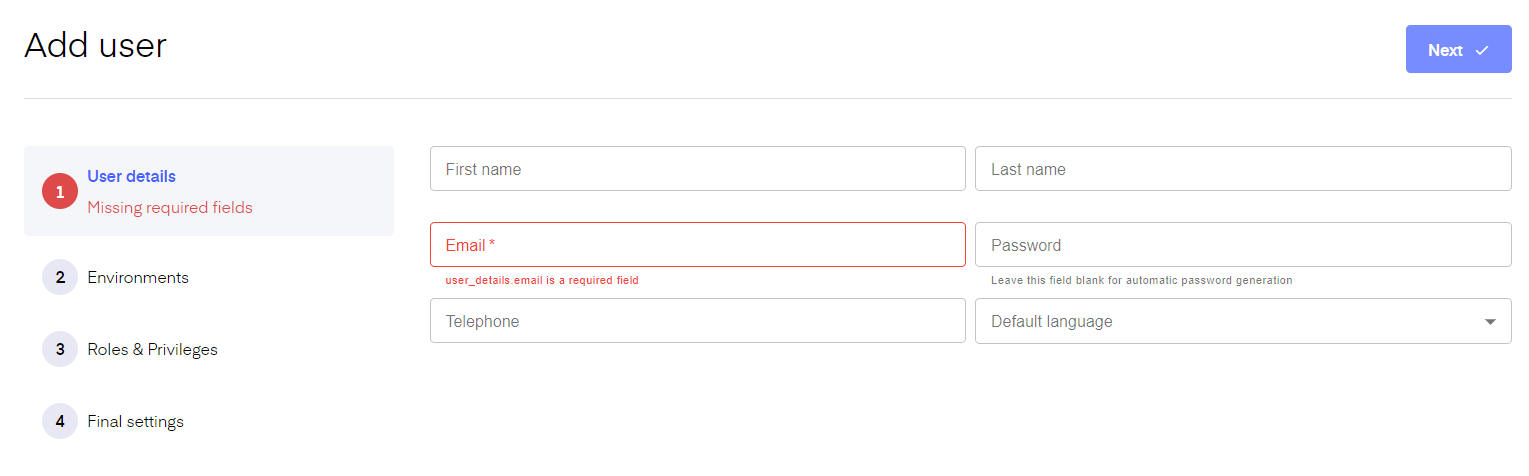
This opens the ‘Users’ page, where you need to click on the ‘Add user’ button from the top right corner of the page.

Fill out the required user detail fields and then click ‘Next’.
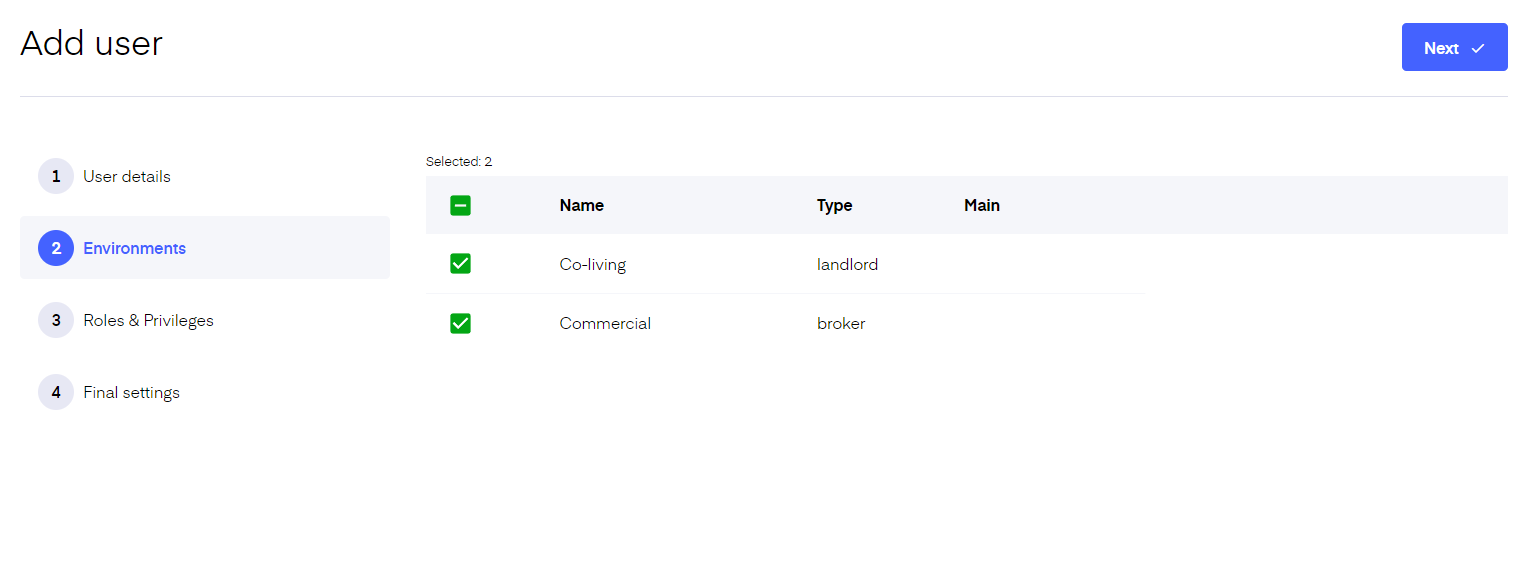
After you’ve filled out the user details you can move on to the next step called ‘Environments’ by clicking ‘Next’. Here you can see a list of all the different environments, if applicable (you can have also only one environment), and pick in which environments the user's privileges are valid. If you have no multiple environments, just tick the one environment you have and click ‘Next’.
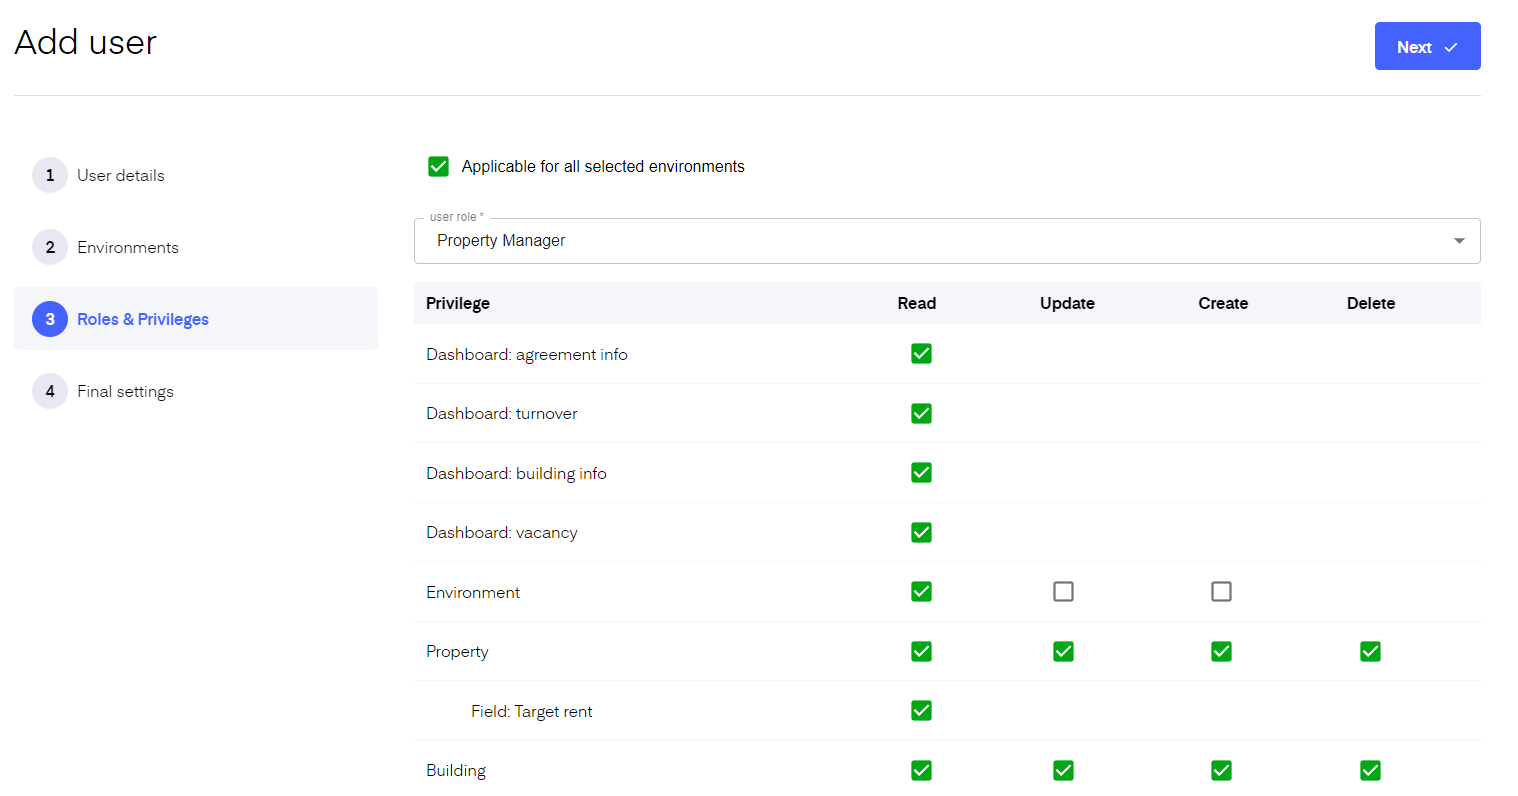
In the next step you have an overview of all the roles and privileges. First, from the top of the page choose one of the five user roles (property manager, broker, accountant, investor, service provider) applicable to the user you’re adding. Choosing one automatically adjusts the privileges below.
You can set the same role and privileges for all of the designated environments by enabling "Applicable for all selected environments", or if you wish, you can give the user different roles and privileges for different environments, by deselecting the option.
You can decide if the new user has read-only access or if they can update, create and/or delete the specific feature. For example, if you are adding an accountant to the platform, they usually don’t need to be able to add and edit your units. They need access to cost allocations, tenant’s balance, your expenses, etc- everything accounting-related. The permissions are, then, set us such. However, you can edit them according to your preferences.
The final and fourth step is ‘Final settings’. To activate a user you need to invite them to the platform. ‘Final settings’ asks you if you would like to send an invitation to created user. It is pre-selected for you. When you’re done click ‘Save’ to finish the process.
The user’s information page shows you a quick overview of them. From the top right corner, you can send an email invitation to the platform for the user. And if needed you can continue editing the user’s access and permissions.
If you have multiple buildings note that by default the new user has access to all the buildings. To change access, click on the user. On the user’s page, you see a column with ‘Permitted buildings’. Click on the number below the title to choose which buildings the user can access.
Push notification tokens
When you or other users first log into Bidrento the system asks for permission to send push notifications. The permissions can later also be changed in site settings. If you or the users opt-in to receive push notifications it will display under the section all the devices the user has opted in to receive notifications from.
From the ‘Actions’ button, you can send a push notification to the user by clicking on ‘Send notification’. The next time the user logs in they will see the push notification. This feature can be used to send important updates or reminders to different users of the platform.