Purchase invoices can be inserted manually, or by importing the XML purchase invoice. Purchase invoices are the basis for the cost allocations.

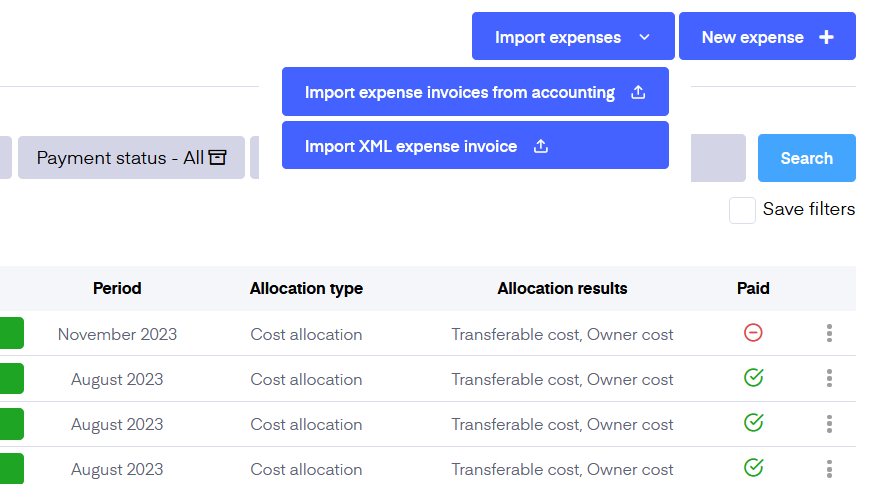
To see the list of added purchase invoices go to ‘Invoices’ - ‘Expenses’. To add a new one, click on the "New expense" button, define the allocation type and fill in all the details, or import the expense by clicking on the "Import XML expense invoice".
Importing XML expense invoices
If you choose the option to import the XML expense, you will need to set up the default articles for the purchase invoices first, which you can do here, under "Default articles", on the "Invoice settings" page.
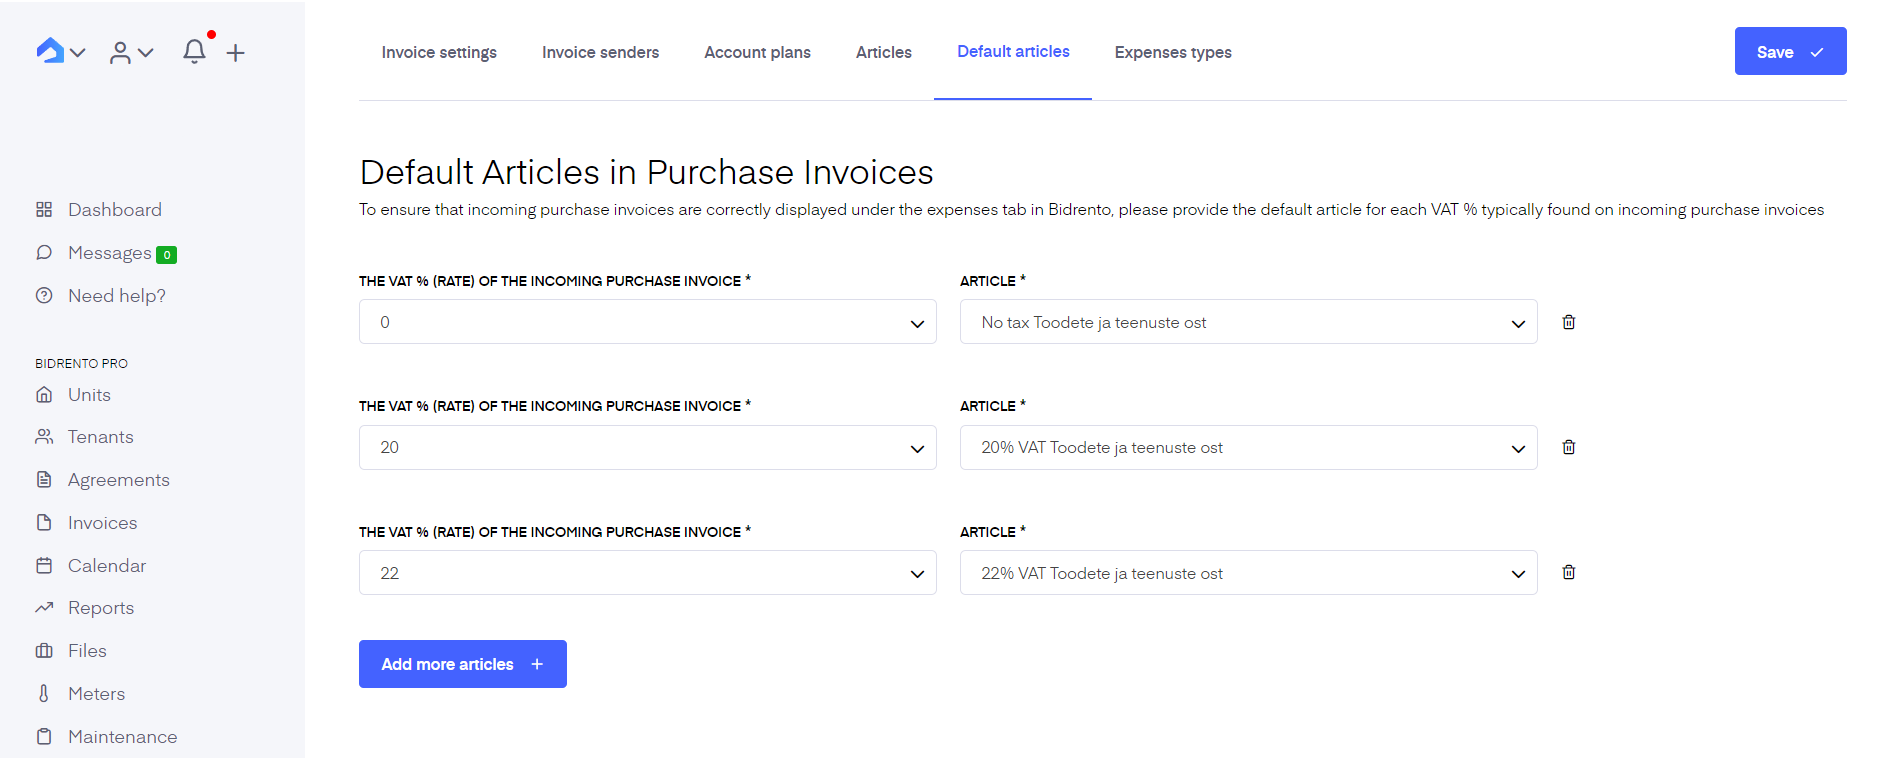
In this section you can add all the necessary default articles.
To set up the default articles, set the desired VAT amount, and choose the corresponding article from the right hand side drop down.
You can add more articles, by clicking on the blue "Add more articles" button at the bottom.
You can do that on the same page, by clicking on the "Articles" section.
Once you have set the default articles, you can proceed to importing the XML purchase invoices. Click on the corresponding button in the top right corner on the "Expenses" page. A modal windows opens up, which then lets you select the XML invoice from your computer, choose the preferred invoice, and click on "Open".
The expense is now automatically imported to the system, and will be visible on the purchase invoice list, with the orange status "Not allocated". From there open up the invoice, click on the "Edit" button at the top right corner, assign it either as an owner cost, transferable cost or cost allocation, choose the desired expense type, assign units, and save. The expense type and unit assignment only applies for the owner and transferable cost.
Adding a new expense manually
To add a new expense, click on the "New expense" button, define the allocation type and fill in all the details.
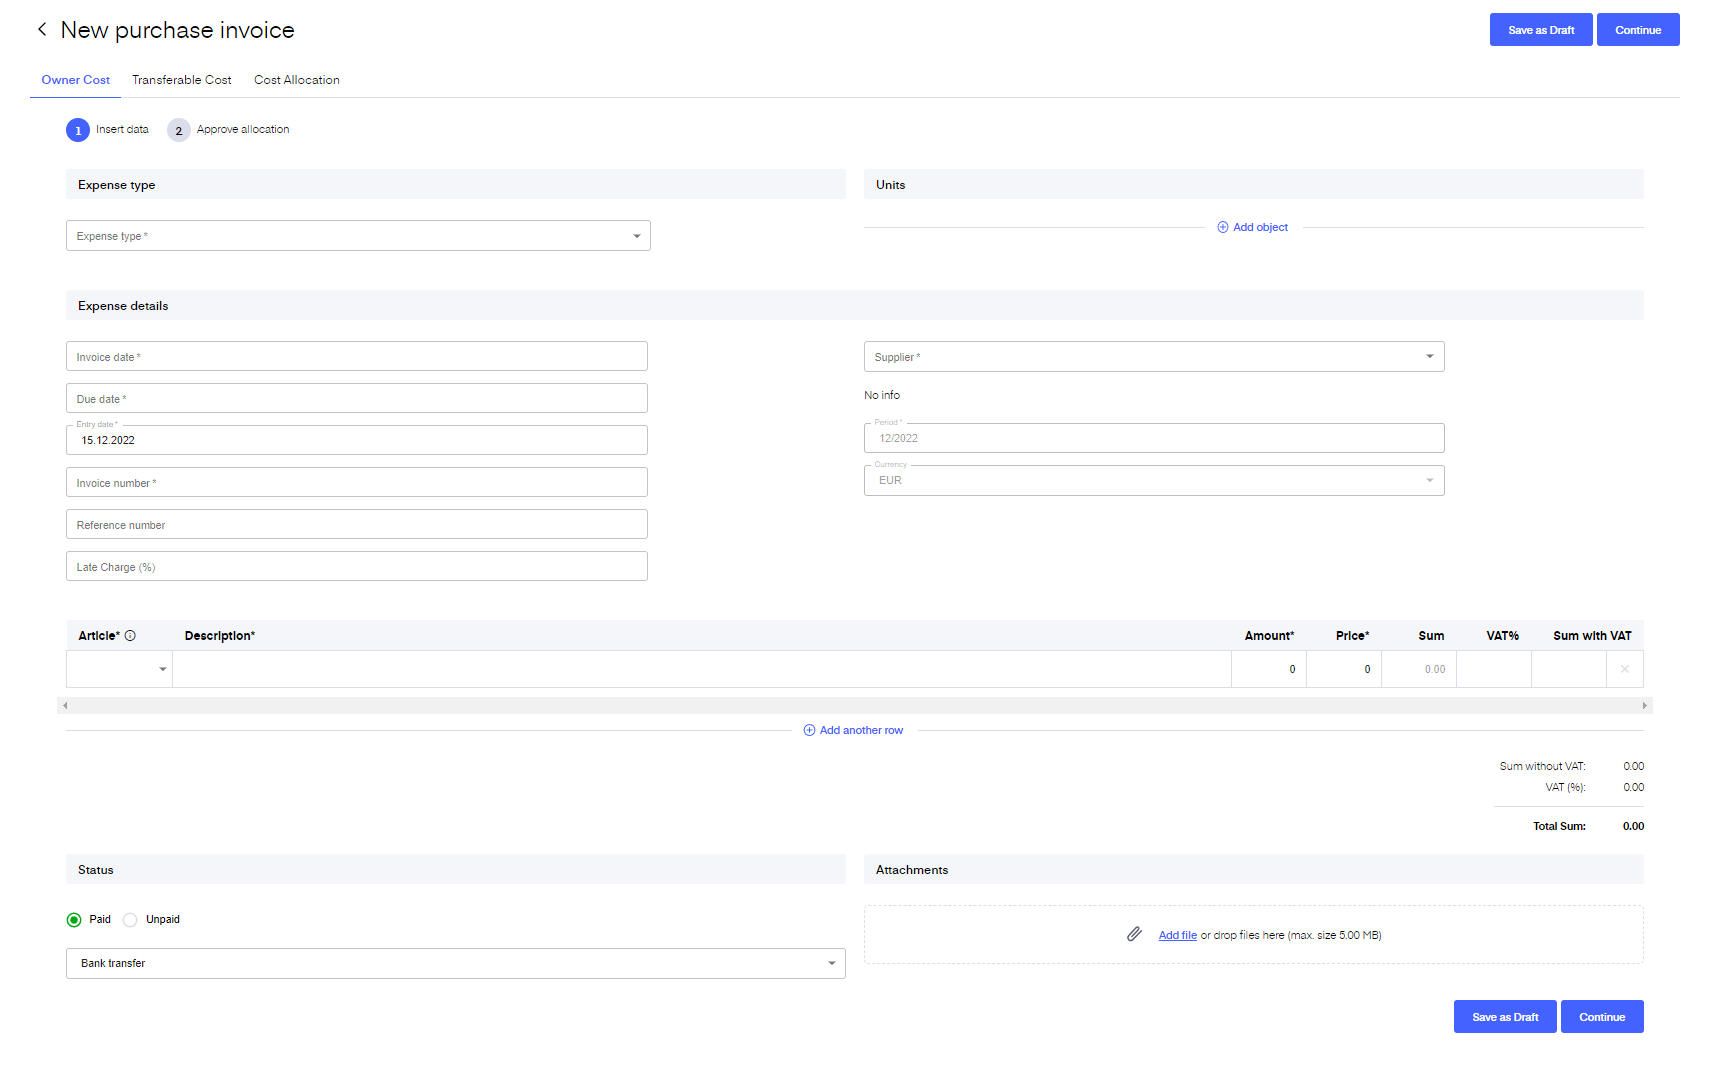
Note that with each purchase invoice you can connect a supplier that you have previously added. Also, you can duplicate recurring purchase invoices monthly, just remember to change the date and other elements that change.
The list of fields required for the purchase invoice
Supplier - choose from the drop-down menu a previously added supplier (link)
Period - period is defined automatically based on the entry date(for which period is the specific purchase invoice applied)
Invoice date - the date the invoice was issued
Due date - the latest date on which the invoice can be paid for
Date of entry - date when the purchase invoice was added to Bidrento
Invoice number - the invoice number on the purchase invoice
Reference number - the reference number on the purchase invoice
On the bottom you find a row where you need to fill out the details:
Description - enter a short description of the service on the purchase invoice
Amount - enter the service amount
Unit - choose an applicable unit for the service
Price - enter the unit’s price
Sum without VAT - is calculated automatically based on the amount and price
VAT(%) - is added automatically based on the article chosen previously
Sum with VAT - is calculated automatically based on the amount and price
You can add additional rows as needed.
Cost type - from the drop-down menu choose the name of the cost type
You can add additional rows as needed.
Automated import of purchase invoices is available in the scope of the following integrations with accounting:
Merit Aktiva and Standard Books - in case you have activated accounting integration with Merit Aktiva or Standard Books, then under the Expense page in the right corner dropdown you will see an additional option called "Import expense invoices from accounting".
.png)