You can see an overview of all the applications to your listings under the ‘Applications’ submenu or when you open the listing by clicking on the ‘View applications’ button on the top of the page.
From the horizontal menu, you can see all the active applications, applications on waitinglist (they appear there if you’ve added them there), or rejected applications (they appear there if you’ve rejected any applications).
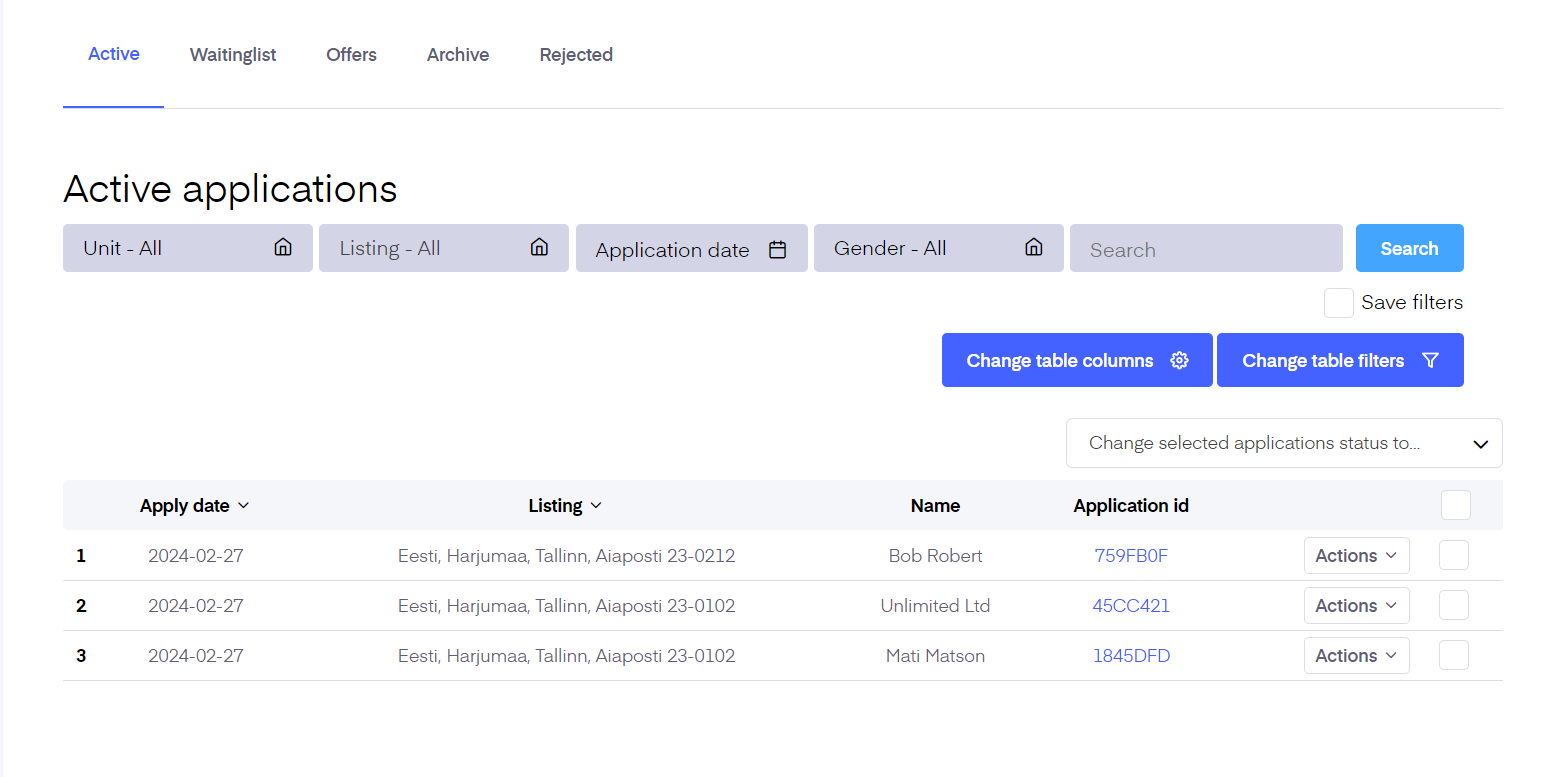
Active
Here you see the list of all the active applications. You can filter all the applications based on units, listings, application date, and gender. There's also possibility to change the applicant table columns, and filters.
You see when people applied, what’s their name, and which listing they applied for. From the ‘Actions’ button, you can see their profile or send them to ‘Waitinglist’.
You can see their profile by clicking on the application row or clicking ‘View’ from the ‘Actions button’. Here you can perform a background check (only Estonia) on the applicant, confirm a viewing with them or offer a new time, choose them as a tenant and create a rental agreement using the information they have provided, reject the applicant fully or offer another unit to them.
You can add any notes on the applicant, so you wouldn’t forget something later and you can edit their application also from your side. For example, you had a showing with them and some new information was shared, you can easily add it to the profile here.
Waitinglist
Here you see the list of all the applicants you’ve added to the waiting list. You can filter them based on the rental object. You see when people applied, what’s their name, and which listing they applied for. From the ‘Actions’ button, you can see their profile and move them to ‘Active’ status again.
You can see their profile by clicking on the application row or the ‘View’ button from the ‘Actions button’.
Offers
Any applicants, you have made offers to, will appear on the "Offers" tab here.
You can make offers to applicants, who appear on the "Active" or "Waiting list" sections. To do that, open the desired applicant by clicking on the application. On the right side of the application overview page, you see a list of options, and the first is "Make an offer".
Then a list of all the units will appear, you can select the particular unit or multiple units you would like to offer for the applicant, set the offer expiration date on the right side of the page, and click on the "Send offer" button in the top right corner of the page. From there, you have the possibility to send the e-mail for the offer.
The e-mail has been pre-filled, and you can now send it out, by clicking on the "Submit" button.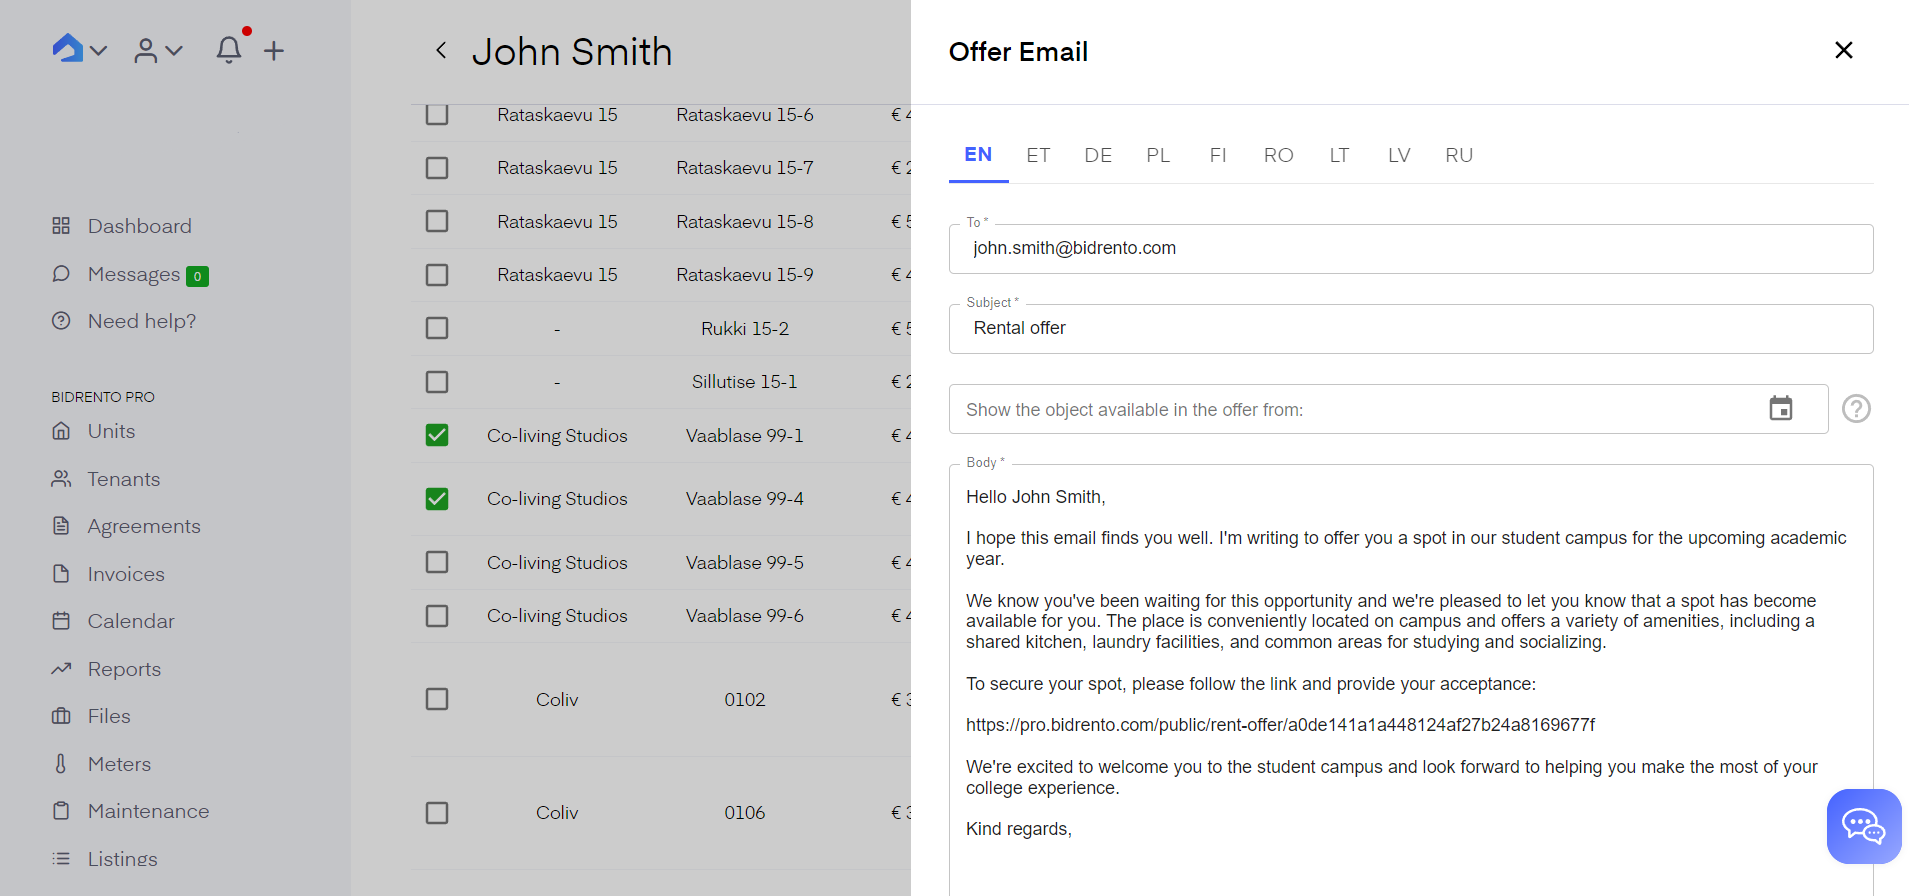
You can edit the e-mail template (and any other e-mail templates) under e-mail settings, which you can find here.
By default, the offer is set to expire in 14 days. You can change the default offer expiration value under Listing settings.
You also have the possibility to resend the offer.
For that click on the offer you have made previously (under the "Offers" tab), which then opens up the offer general view. From there, you can see for what units you previously made offers for, when it was sent out, when the offer will end, etc. In the top right corner, there's a "Resend offer" button, which opens up the modal window with the pre-filled e-mail, and from there you can send it again.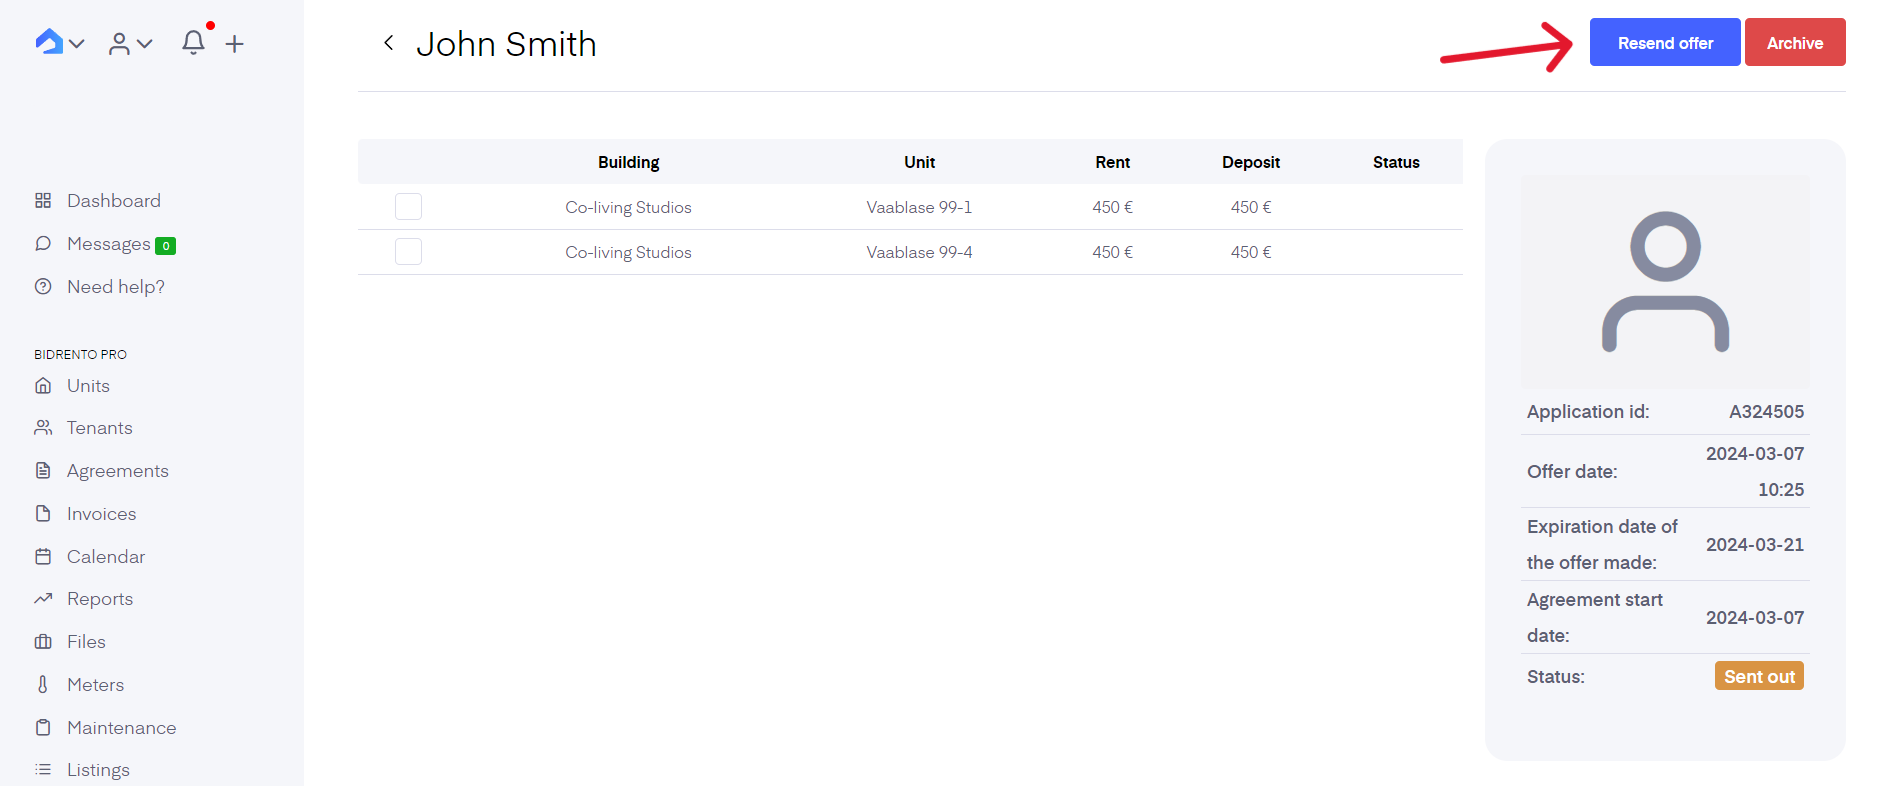
If you wish to archive a particular offer, you can do it in the same view previously mentioned. For that, there's a separate red button, marked "Archive".
All the archived offers will be transferred to the "Archive" section.
Once the offer is sent out, the applicant will receive the e-mail with a link where they can either accept or reject the offer.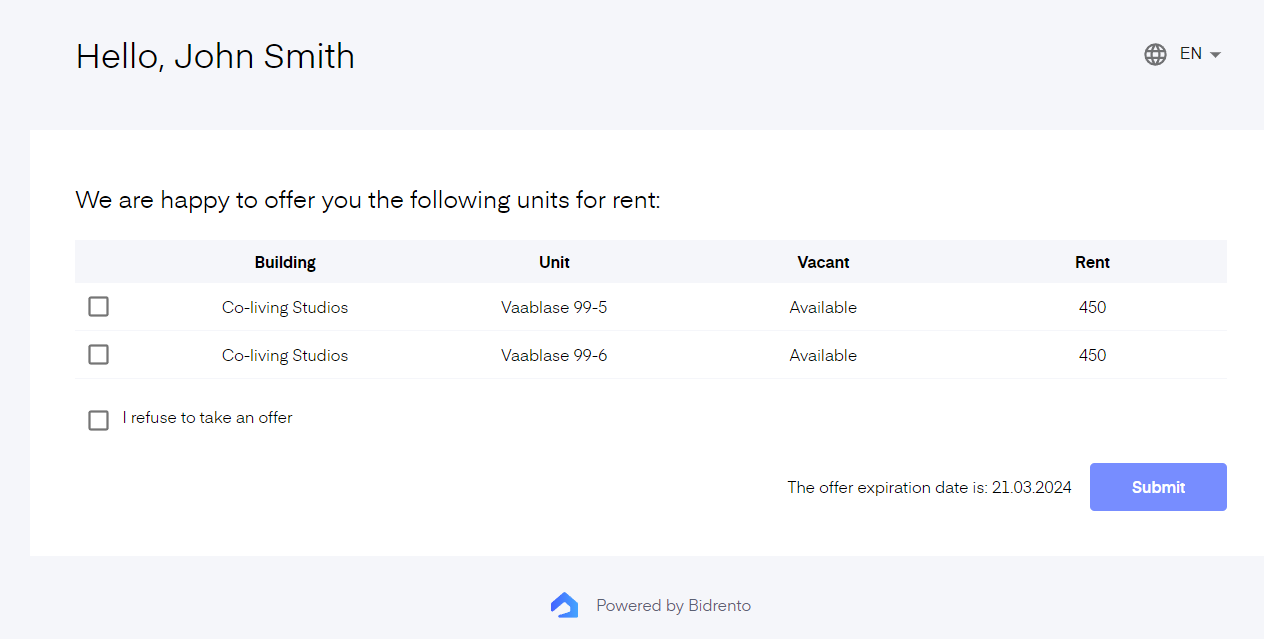
If they accept or reject the offer, they're answer will be visible under the "Offers" section, with the status behind every offer.
Archive
Any applicants you have signed contracts with, and offers that have expired or been archived will appear here, under two different tabs.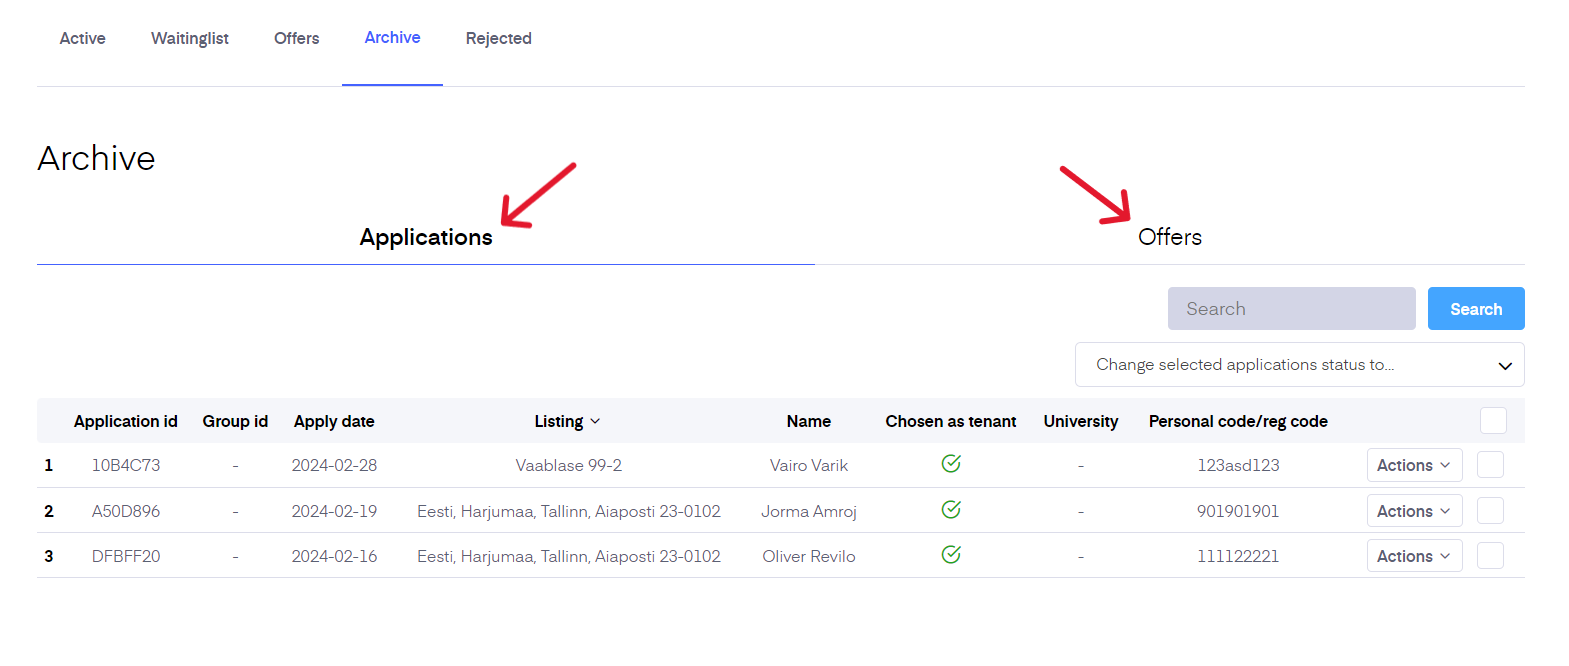
Rejected
Any applications you’ve marked as ‘Rejected’ appear here. You can filter them based on the rental object. You see when people applied, what’s their name, and which listing they applied for. If you wish, you can move the rejected applicant to "Archived" or "Waiting list", by selecting the desired applicants, and clicking on the "Change selected applications to..." button on the top right corner, above the list.
You can see their profile by clicking on the application row or clicking ‘View’ from the ‘Actions button’.