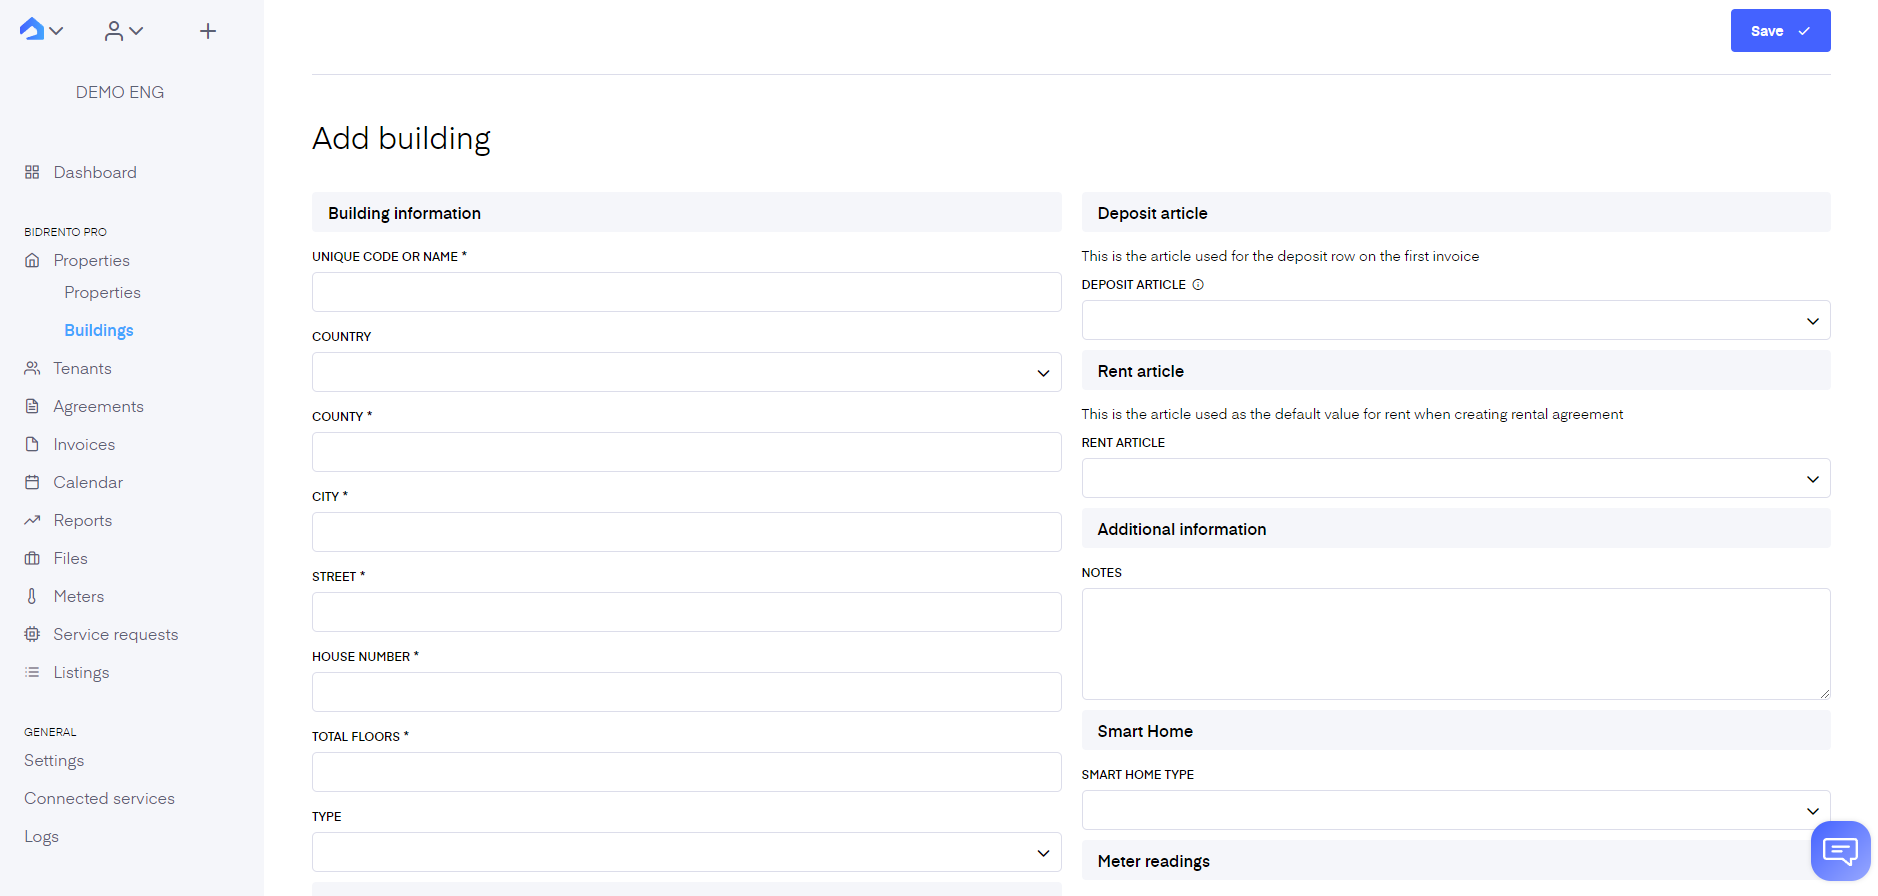
To add a new building to your account click on the ‘New building’ button. This opens the building description page. 
Fill out at least the mandatory fields marked with an asterisk to continue, but the more information you add the better.
Find each field’s description below:
Unique code or name - this code or name will be used on the platform to reference your unit. Choose a code or name that will help you easily recognize the unit.
Country - choose from the drop-down menu which country the building is in
County - name of the county where the building is located
City - name of the city
Street - name of the street
House number - number of the particular house
Total floors - number of floors in the building
Building gross area - gross area of the building (enter with numbers)
Type - choose what kind of unit it is (residential, accommodation, mix-use, office, retail, co-living, student house, warehouse, industrial)
Building registry number - registry number which has been issued to the building
Cadastrial code - cadastrial code which has been issued to the building
Staircase/entrance - here you can enter all the staircase names or numbers individually which are in the building. If you fill this out, then another field opens up in the Unit card, and you can assign a particular staircase/entrance information to the Unit card
Contact name - the name of the contact person who takes care of the communication with tenants
Contact email - email address which is used to contact tenants
Invoice sender - this is the account from which your invoices are sent out from. You can see, edit and add your invoice senders in your Bidrento enivronment here.
Deposit article - select an applicable article from the dropdown menu, the article will be connected with the service and defines the tax rate. This can also be specified globally in the Rental Agreement Settings. This is the article used for the deposit row on the first invoice. Reports will exclude invoice lines with this article from calculations
Rent article - pick a default rent article that will be used to create rental agreements for the building
Notes - any additional information that you would like to point out about your building.
Smart home - if the building has a smart home integration, choose the applicable option from the dropdown menu. You can activate smart home integration in the Connected services section here.
Meter readings - enable the toggle if the tenants in the building need to submit their meter readings manually. Enabling means that all the units in the building are by default subject to sending in their meter readings, to change that for a specific unit, you can overwrite it under unit settings (link).
Vacancy calculation settings - if you wish, you can exclude object types from vacancy calculations shown under the Building detail view and on the Dashboard graph, by choosing desirable object types from the drop down menu.
Accounting dimensions - Accounting dimensions are like tags, or data, that you can add to each transaction so that they can be grouped for analysis purposes.