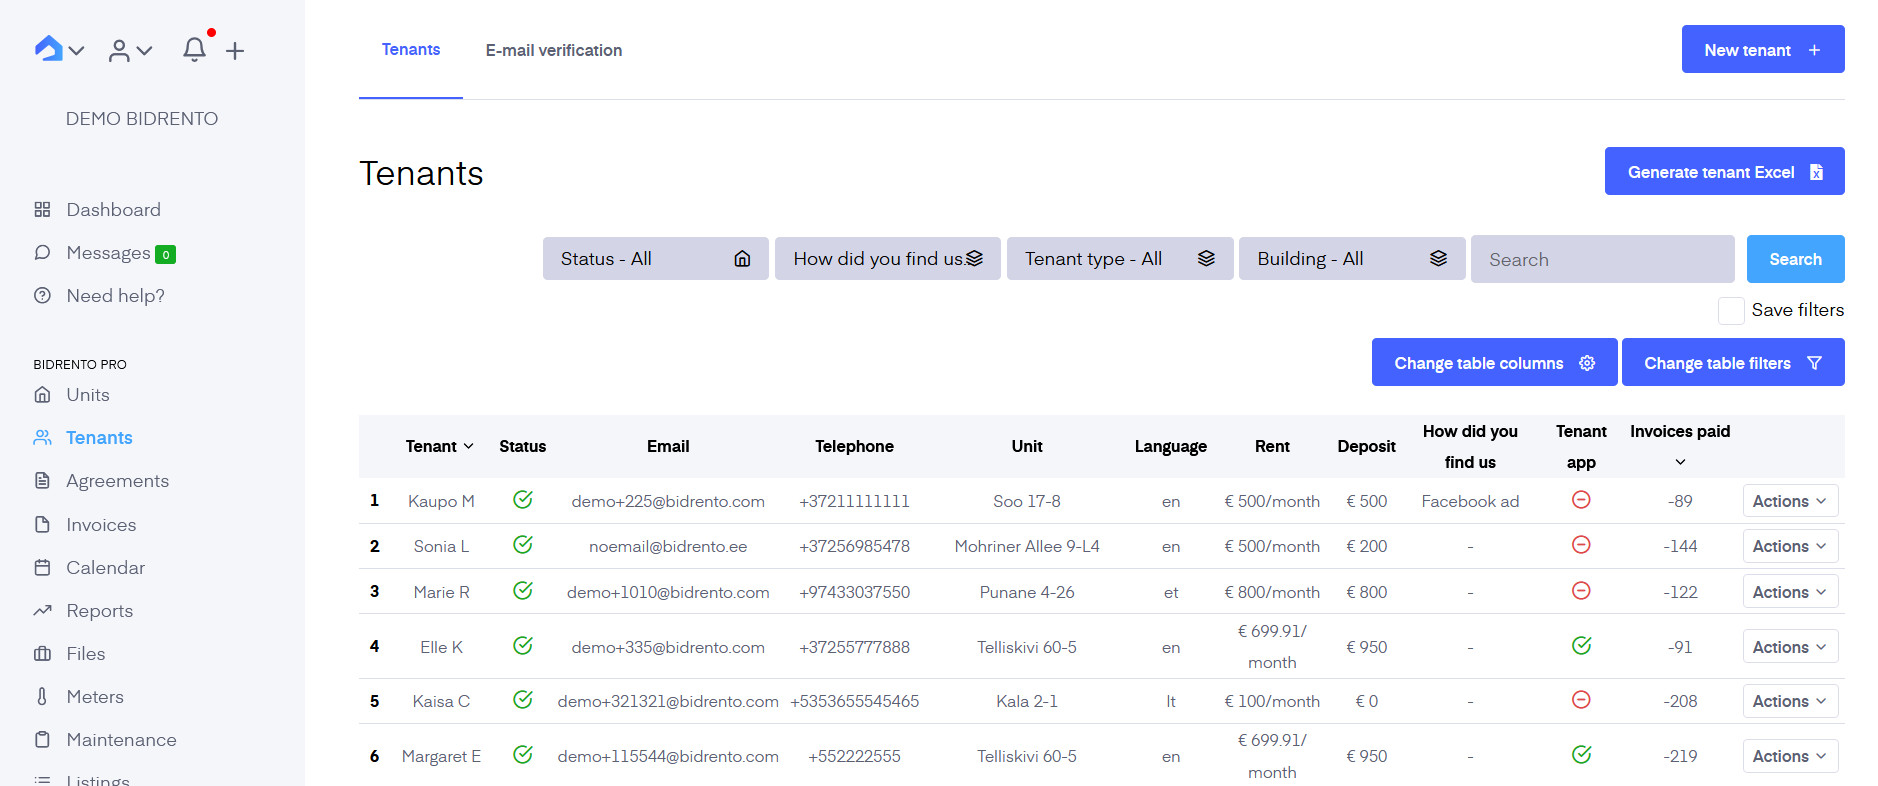
Here you can add and manage your existing tenants. After adding a new tenant you can associate the tenant with a rental agreement.
In the listing view, you can sort, filter, and search all your tenants. Tenants can be filtered based on whether they have an active agreement or not, how they find you, tenant type, or the building.
In the tenants overview, you can also create an Excel report with the stats of your tenants in the selected time period.

In the Tenants page, there's a separate tab named "E-mail verification".
Under that tab is a list of tenants for whom the system has completed the e-mail verification process.
There you can see the tenant, agreement period, e-mail address, verification result, verification date, and Actions button, which enables you to edit the tenant's information.
You can also see the tenant's payment behavior.
The behavior metrics are visible when you open up a tenant, and click on the Invoices tab in the top of the page.
In addition, you can check any changes that have been carried out on the tenant's profile (changes in the data made by you or other users), under the "View history" button in the top right corner.
If your tenants are not using Bidrento’s Tenant App yet, you can send them an email invitation by clicking the ‘Actions’ button and choosing ‘Invite tenant as a user. This opens a new window letting you add the ‘From name’ and ‘From email’ (by default email is the one associated with your Bidrento account but can be changed). If the tenant accepts the invitation to the app, a notice (‘Tenant has accepted invitation’) confirming that appears under the Tenant detail view page.
You can also automate tenant invitations. For that go to Settings - Tenant App - Tenant App invitation settings - Activate the toggle “Send Tenant App invitations automatically” and define the number of days (before the start of the agreement), when the invitation will be sent. If you have created an agreement with the start date to be defined as today, the tenant will receive an invitation immediately.
Under the ‘Files’ section, you can see all the documents you’ve drawn up for the tenant. You can see if the documents have been signed and if they have been shared with the tenant. Additionally, you can upload any files you wish to share with the tenant. The tenant will see them in their Tenant app.
All files uploaded here are also available in the ‘Files’ menu.
If you have assigned any prepayments for the tenant, you will see that information under the Prepayments section.