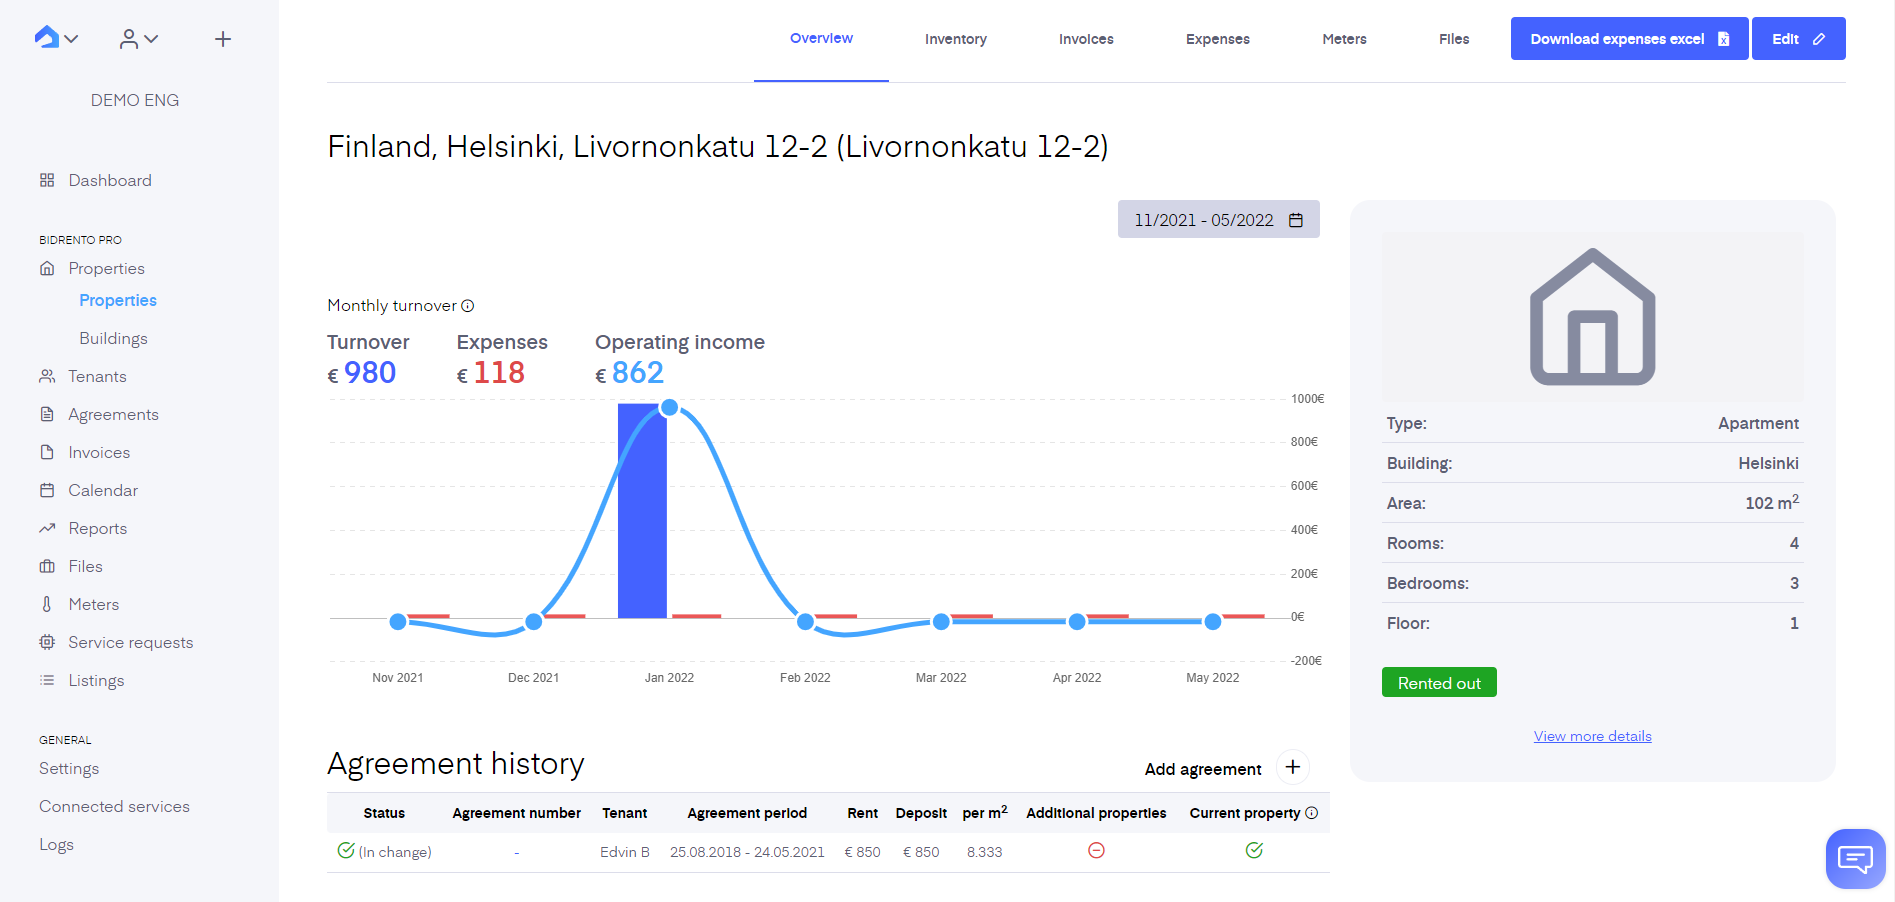
After you’ve successfully added a unit to the platform you can continue updating all the information about them by clicking on the unit’s line you wish to update. This opens the unit’s overview. Under each unit detail view in the upper horizontal menu, you can upload the unit’s inventory, and see its invoices, expenses, meters, and any files related to the unit.
Inventory
Here you can upload all the inventory that comes with the unit. You can manually add each item or import them from an excel file (buttons ‘Add item’ and ‘Import inventory’). When adding the inventory you can indicate their condition, quantity, price, purchase date, model, and any additional information. ‘Show additional fields’ opens fields where you can specify in more detail the producer, serial number, etc. of the item.
You can upload and add all items together or you can add different rooms of the unit and add items to corresponding rooms. If you wish to add inventory items to the room you need to first add the room list. You can do that from the ‘Manage rooms’ or ‘Add room list first’ buttons. After the rooms have been created you can add the items under each room from the plus (‘+’) button.
Content from here will be available as a content variable when creating a document. This helps you draw up for example a handover act.
Invoices
This is where all the invoices sent to the unit will be listed. You can see whether they’ve been paid for or not.
Expenses
Any expenses added to the unit or any expenses shared between the units are shown under this section (add expenses here). The table shows you the expenses divided by the last twelve months. Also, you get to see an average expense amount in the last 6 months and 12 months.
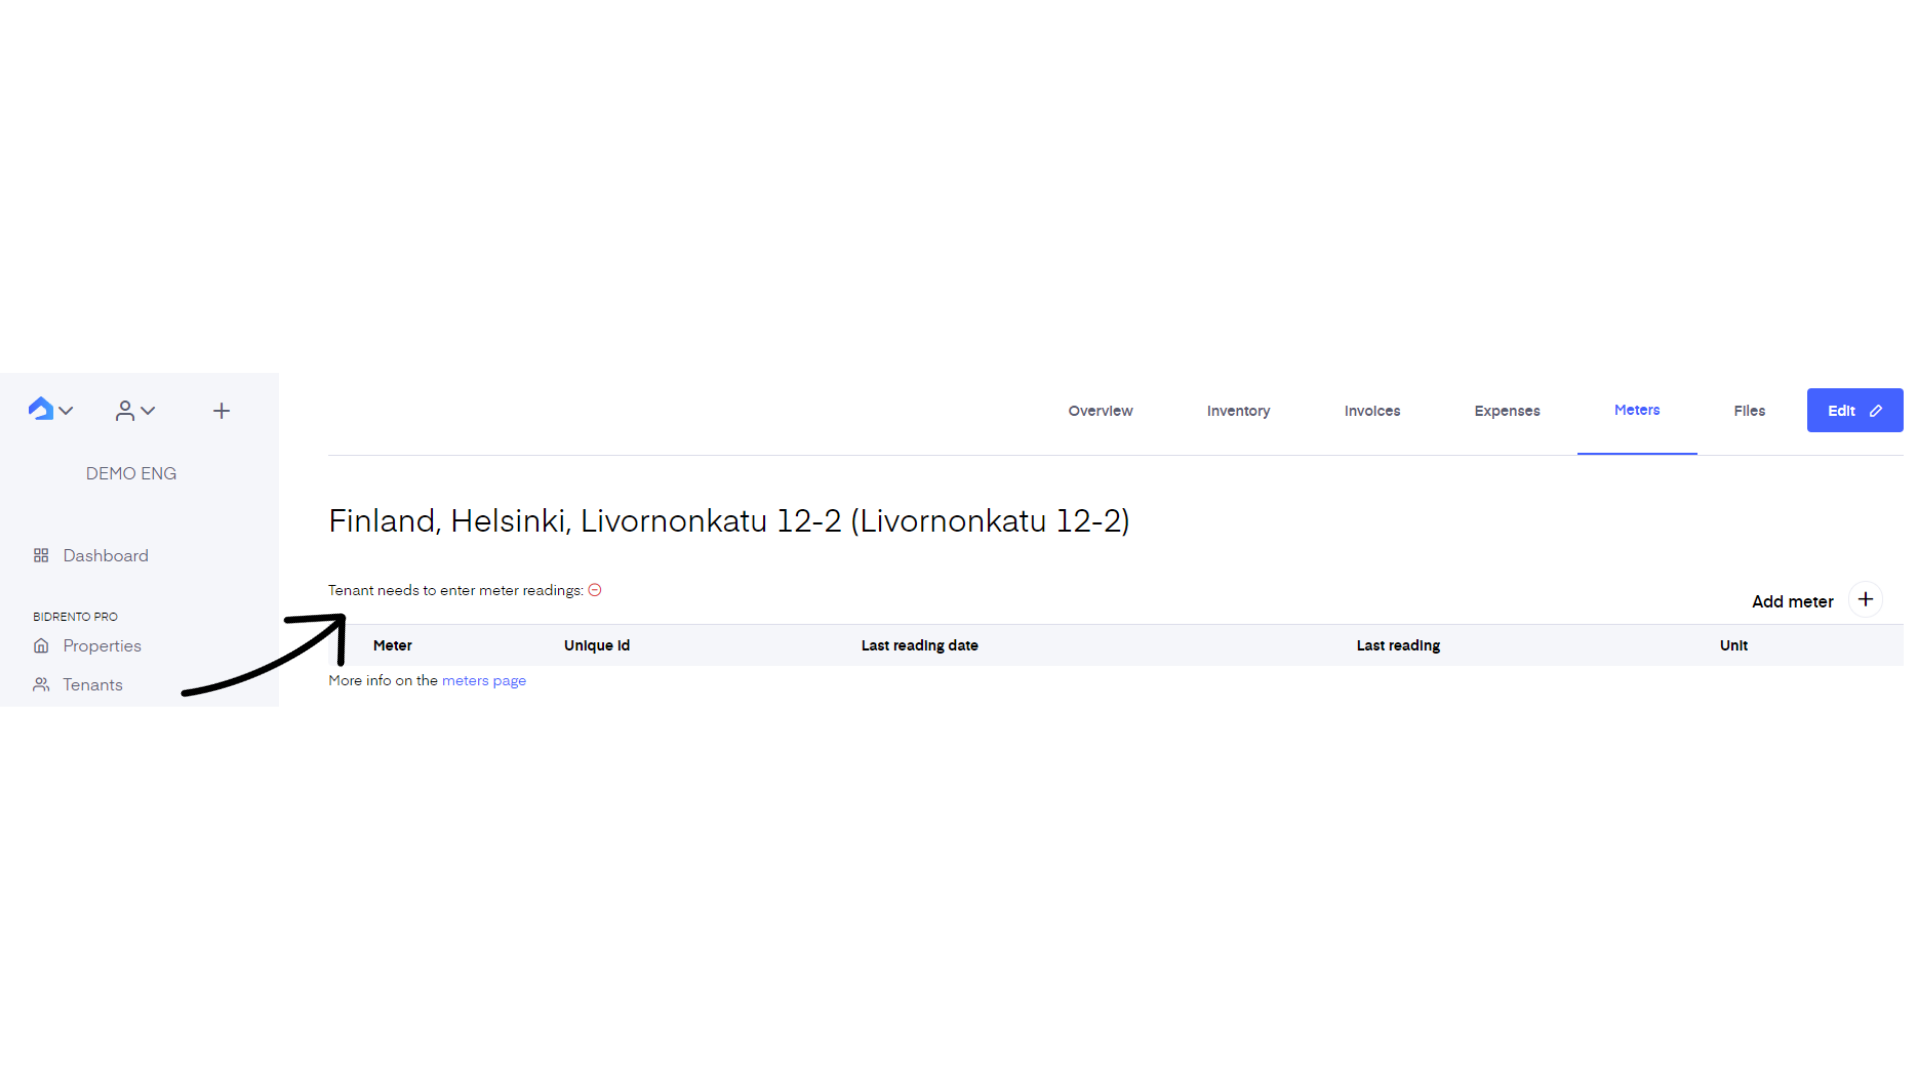
Meters
Here in the ‘Meters’ section is where you set up meters for the unit that needs readings. You can add new meters from the ‘Add meter’ button.
Note that on top of the table it shows you whether you’ve selected that the tenant needs to enter meter readings or not. This can be changed from the ‘Edit’ button in the top right corner of the page (link).
.png)
Initial meter reading for new tenants
If you have a new tenant moving into the unit you need to enter an initial reading from which the future readings will continue. To do this click on the ‘Action’ button and choose ‘Add reading’.
This opens the readings pop-up, enter the meter reading and tick the ‘Initial reading’ box. Now, this reading will be saved as the initial reading and all readings added in the future will continue from this.
Final reading for leaving tenants
If you have a tenant moving out from the unit you need to enter a final reading. This calculates the last utility bill for the customer. To do this click on the ‘Action’ button and choose ‘Add reading’.
This opens the readings pop-up, enter the meter reading and tick the ‘Final reading’ box. This enables the system to create an accurate last utility invoice for the tenant.
Files
Here you can keep all the documents and files related to the unit. All the files can be shared to the tenant from here. Just click on ‘Actions’ button on the file row and choose ‘Edit file or share with tenant’. You’ll see a pop-up where you need to enable the ‘Share with tenant via tenant app’ then click ‘Change’. After this the file will appear under ‘Files’ for the tenant in their app.
All the uploaded files here will also be available under ‘Files’ in the side menu.
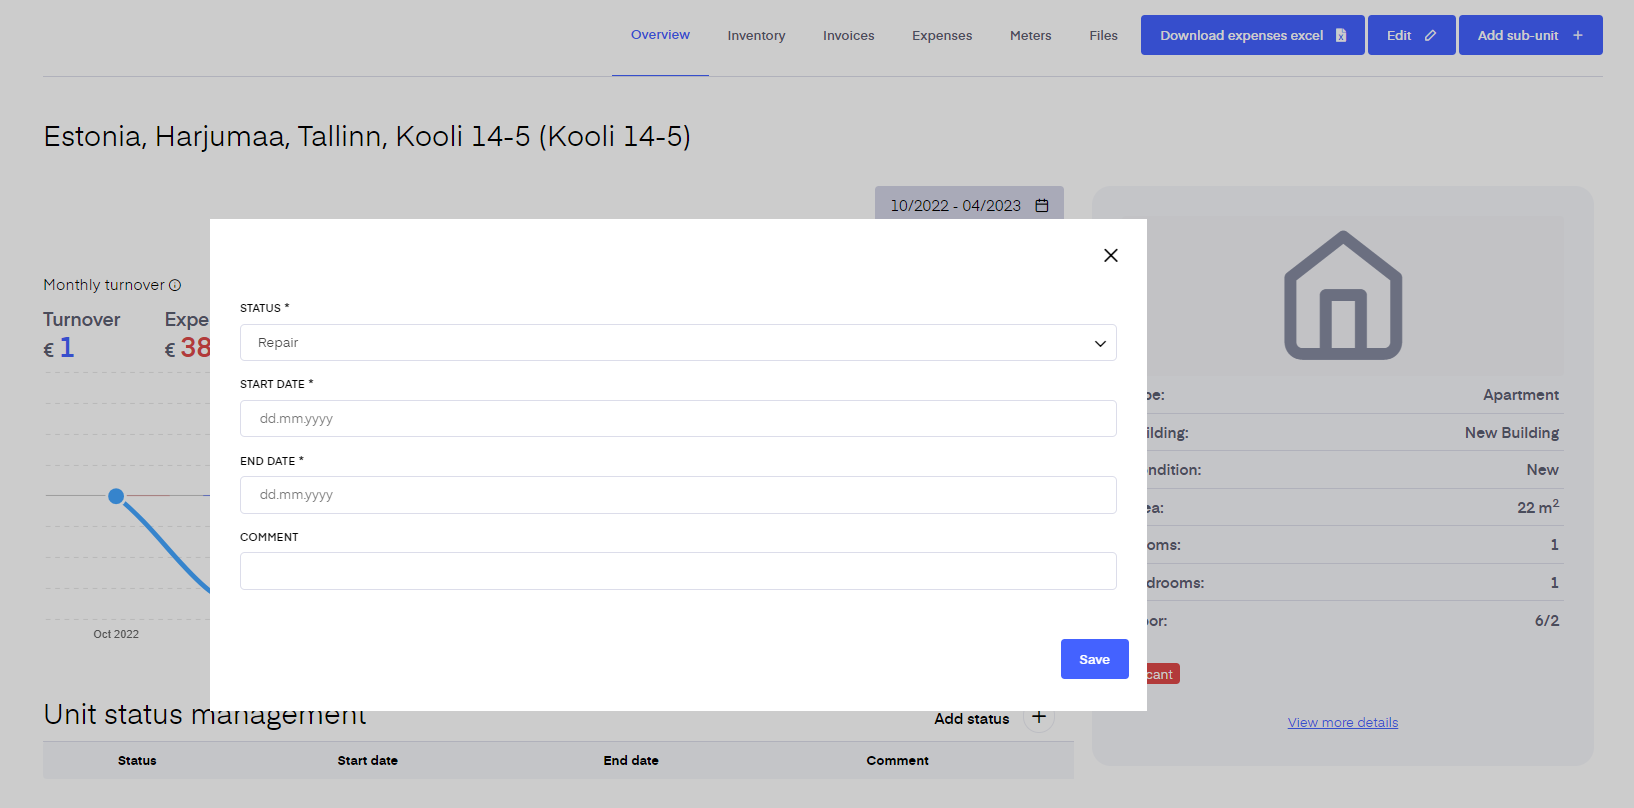
Unit status management
If Your unit is currently unavailable for rent or will be in the future, You can set a specific status stating the reason, why is it vacant. To set a status You have to click "Add status" button on the unit view, choose the status in the dropdown, enter the start and end date. If You apply this status, it means it will not be possible to add an agreement for the chosen period. In addition to this, if a unit has an active rental agreement, it is also not possible to add a status. The status can be applied only when the unit is vacant during this time.