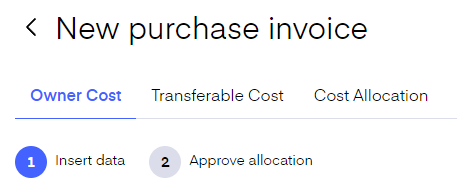
To add a new expense go to ‘Invoices’ - ‘Expenses’ and click on ‘New expense’. This opens the expense input page. There you need to first choose if you want to add a owner, transferable cost or cost allocation. .png)
Owner cost - this means that the expenses will be covered by the owner. Here no invoices for the cost will be created. All costs need to be assigned to units they relate to. Allocation results can be seen under the included units’ ‘Expenses’ tab.
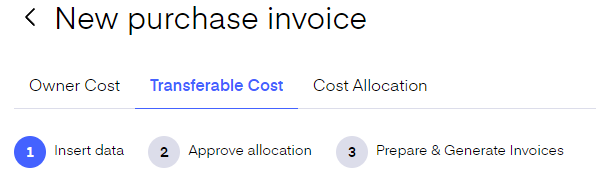
Transferable cost - this is an expense that will be covered by the units it is assigned to with active rental agreements. If a unit participated in the cost allocation but is not covered by an active rental agreement, it will be automatically saved as owner cost. An invoice will be created for the expense after cost allocation that can be sent to the units. Allocation results can be seen under the included units ‘Expenses’ tab.
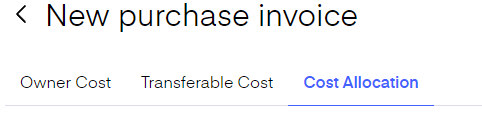
Cost allocation - this means that the expenses will be used for cost allocation calculation flow. ‘Cost allocation’ is where you can create utility bills. The utility cost allocation is building-based. This means you can set different or the same rules for each building in your portfolio. Based on these rules the costs will be divided on a regular basis between the units and tenants of that building. Please read the following chapters for detailed instructions: Allocating the costs, Cost Rules.
Expenses used in the cost allocation rules will be visible on the expense view page as either transferable or owner cost. If expense data is edited the cost allocation process needs to be redone to update the allocation.
Adding the cost itself is the same for Owner and Transferable cost:
- Define the ‘Expense type’ by clicking on the row and choosing the correct type from the drop-down menu.
- Next, choose the units that this expense affects. Click ‘Add unit’, select the correct building(s) (you can choose units from different buildings), and tick the correct units.
- If you’re adding a ‘Transferable cost’, after picking the units a new tab opens where you need to choose whether the cost is divided by the number of units or the unit area.
- Fill out the ‘Expense details’ (details marked with an asterisk are mandatory):
Invoice date- enter the date the invoice was issued on
Due date- enter the date the invoice is due for payment
Entry date- this defines the period when the service will be/was made, this date will place the cost in the correct allocation period. The entered date also automatically fills in the ‘Period’ field to the right of it.
Invoice number- the invoice number on the invoice
Reference number- the reference number on the invoice
Late charge (%)- if applicable enter the percentage for the late feeSupplier- suppliers need to be pre-added under ‘Suppliers’. To choose the supplier just click on the field and choose the correct supplier from the drop-down menu
Period- this field is pre-filled from the ‘Entry date’ fieldCurrency- this field is prefilled based on the default currency chosen under ‘General settings’
- Fill out the cost bar. Choose the article applicable to the cost. Articles can be added and edited under ‘Articles’. After that write the description for the cost, and add the amount and price. You can add multiple rows for the cost bar.
- Then mark if the cost has been ‘Paid’ or it is ‘Unpaid’ under the ‘Status’ section. If you tick ‘Paid’ choose also from the drop-down menu if it was paid for in cash or bank transfer.
- If you wish you include any attachments, you can do it under the ‘Attachments’ section. For example, you can include the original purchase invoice here.
After you’re done filling in all the fields you have the option to save everything as a draft or continue with approving the allocation.
'Saving as a draft' creates the cost under 'Expenses', but its status is 'Not allocated'

You can continue editing it by just clicking on it.
Approving the allocation for owner cost
Approve the allocation page shows you a quick overview of the cost information that you’ve just added. Just check if all the information is correct. If you need to change anything just go back to the previous page from the ‘Previous’ button. If everything is correct, click ‘Approve allocation’.
This creates an expense row on the ‘Expenses’ page and also includes the cost under the involved unit’s ‘Expenses’ page.
Approving the allocation and generating invoices for transferable cost
With the transferable costs, you need to also create invoices for the cost to send to the units affected by the cost. So after filling out all the information about the cost you need to click ‘Continue’ and you are taken to the ‘Approve the allocation’ page. Check if the information is correct. Please note, that the platform automatically detects if the units included in the cost have active rental agreements, if they don’t have them, the cost that was allocated to them will be added as an owner cost and will be presented as such.
After making sure all the information is correct click ‘Approve allocation and Generate invoices. This opens the ‘New Purchase' invoice page where you can either only create the invoices or create the invoices and send them to the tenants. If you choose to only generate the invoices, the invoices can be found under ‘Unsent invoices’.